3 Ways to Create Permission Sets for Your Salesforce Account in 2026

Managing user access in Salesforce can sometimes feel overwhelming, but it doesn’t have to be. Permission sets are a helpful way to tailor access levels for users without overcomplicating your setup. By understanding how to create these sets effectively, you can streamline user management and ensure everyone has the right tools for their job.
In this article, we’ll explore three effective methods for creating permission sets in your Salesforce account. These approaches will help you improve user access management so you can focus more on what really matters, growing your business and supporting your team.
Table of Contents
Use Salesforce’s UI
Creating a permission set gives someone extra access without changing their profile. Follow the steps below in the Salesforce UI.
1. Head to Setup
- Click the gear icon in the top-right corner.
- Select Setup.
Salesforce’s “Create Permission Sets” help page starts here too if you need a visual.
2. Find the Permission Sets page
- In the Quick Find box on the left, type
Permission Sets. - Click Permission Sets in the results list.
3. Click New
- The Permission Sets list opens.
- Click New.
4. Fill in basic info
- Label: Name the set clearly (for example, “Marketing Read Only”).
- API Name autofills, no change needed.
- Description: Note why you’re making it.
- User License: Pick “None” if it should work for many license types. Choose a specific license only when necessary.
- Click Save.
5. Add app and system permissions
You land on the permission set overview.
- Under Apps, click App Permissions to choose items such as “Run Reports.” Check what you need, then Save.
- Under System, click System Permissions for options like “View All Data” or “Reset User Passwords.” Again, select and Save.
- Repeat for any other sections (Object Settings, Field Permissions, etc.). Salesforce’s doc lists what each section controls.
6. Assign the permission set to users
- In the permission set menu on the left, click Manage Assignments.
- Click Add Assignments.
- Select the users who need this access.
- Click Assign, then Done.
7. Test access
Log in as, or ask, one of the assigned users to confirm the set works. If something’s missing, return to the permission set and tweak permissions as needed.
You’ve created a permission set that’s ready for repeat use. Modify it or assign it to more people whenever the need comes up.
Use Torii
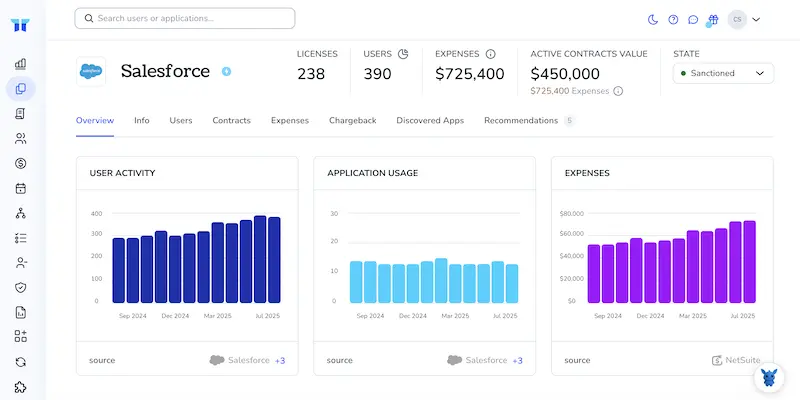
Instead of accessing Salesforce directly, consider using Torii, a SaaS Management Platform that helps establish permission sets within Salesforce. This platform streamlines the management of your SaaS subscriptions and integrations, making it easier to onboard or offboard users, view subscription details, and much more from a single interface.
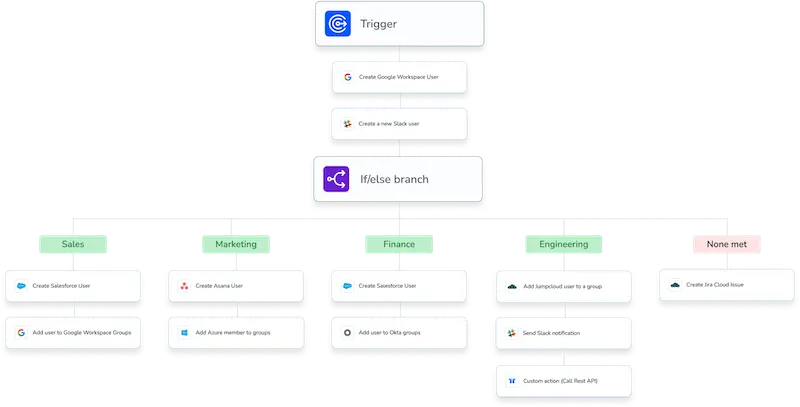
Torii removes the manual processes traditionally tied to Salesforce. This tool allows you to automate actions based on specific triggers, such as hiring new employees, offboarding departing staff, or renewing contracts. Automating these tasks can save you a lot of time, especially if you often carry out these actions.
Setting up permission sets in Salesforce through Torii is straightforward.
1. Register for Torii
Reach out to Torii Sales to request a complimentary two-week trial of the service.
2. Link your Salesforce account with Torii
After activating your account, connect your Salesforce account to Torii (assuming you already have one). Integration instructions for Salesforce can be found here.
3. Develop a Torii workflow for Salesforce
In Torii, you can create automated workflows that generate permission sets in Salesforce. Go to the Workflows tab to set up a trigger and specify an action to create the permission sets. As a result, every time the trigger occurs, Salesforce will update automatically.
Use Salesforce’s API
This walkthrough uses the Salesforce REST API to create a permission set and assign it to a user. No clicks, just code.
1. Grab an access token
- Send a POST request to the OAuth 2.0 token endpoint.
- Grant type is
password,authorization_code, or any flow your org allows. - Hang on to
access_tokenandinstance_url. They ride along with every call that follows.
POST https://login.salesforce.com/services/oauth2/token
grant_type=password
client_id=YOUR_CONNECTED_APP_ID
client_secret=YOUR_SECRET
username=[email protected]
password=pwd+securitytoken
2. Build the Permission Set payload
- At minimum, include a meaningful
LabelandName. - To give app or object rights, add fields like
HasActivationRequired,PermissionsMarketingUser, or object permission arrays. Check the REST API Developer Guide for every field you can set.
{
    "Label": "API Demo Permission Set",
    "Name": "API_Demo_PermSet",
    "PermissionsReadMetadata": true
}
3. Create the Permission Set record
- POST to the
PermissionSetsObject endpoint. - Include your token in the header:
Authorization: Bearer ACCESS_TOKEN.
POST https://your_instance.salesforce.com/services/data/v58.0/sobjects/PermissionSet/
Content-Type: application/json
Authorization: Bearer ACCESS_TOKEN
{ .payload from step 2. }
The response returns an id. Copy it; you’ll need it for assignments.
4. Assign the Permission Set to a user
Build a PermissionSetAssignment payload that pairs the new permission set with a UserId.
{
    "AssigneeId": "0053h000007pQR1AAO",
    "PermissionSetId": "0PS3h0000008abcCAA"
}
Post it to /sobjects/PermissionSetAssignment/.
POST https://your_instance.salesforce.com/services/data/v58.0/sobjects/PermissionSetAssignment/
Content-Type: application/json
Authorization: Bearer ACCESS_TOKEN
{ .payload above. }
5. Confirm everything worked
Get the created assignment:
GET https://your_instance.salesforce.com/services/data/v58.0/sobjects/PermissionSetAssignment/0Pa3h000000XYZCAA0
Authorization: Bearer ACCESS_TOKEN
A 200 response with the fields you set means the permission set is live on that user.
6. Clean up or update as needed
- To tweak the permission set later, PATCH the
PermissionSetrecord with only the fields you want to change. - To remove the set from a user, DELETE the
PermissionSetAssignmentrecord.
That finishes the job and proves the entire flow works without clicking through the Salesforce UI. Nice work.
Torii for SaaS Management
If you’re interested in learning more about SaaS Management, reach out to us. Torii’s SaaS Management Platform helps you with:
- Identifying hidden software: Use AI to thoroughly scan your organization for unauthorized applications. This process operates in real-time and continuously works in the background.
- Reduce expenses: Cut costs by removing unused licenses and unnecessary tools.
- Automate onboarding and offboarding: Make your IT workflows more efficient to save time and reduce errors during onboarding and offboarding.
- Receive contract renewal notifications: Keep track of important contract renewals and avoid missing deadlines.
Torii is the leading all-in-one SaaS Management Platform, providing a unified view for Finance, IT, and Security teams.
Discover more by visiting Torii.
Frequently Asked Questions
To create permission sets in Salesforce, go to Setup, find Permission Sets, click New, fill in details, and assign it to users.
Permission sets allow you to provide additional access to users without altering their profiles, streamlining user management.
Torii automates the management of permission sets in Salesforce, simplifying onboarding and offboarding processes for users.
Assign a permission set by going to Manage Assignments in the permission set menu, selecting users, and clicking Assign.
Yes, permission sets can be created using Salesforce API by constructing a JSON payload and sending a POST request.
If a permission set isn't functioning, log in as the user to test it, and modify permissions if something is missing.
