3 Ways to Edit Users in Salesforce in 2026

Keeping user records current in Salesforce can feel like whack-a-mole. A new hire needs a license, someone switches teams, another takes on a project that demands extra permissions.
This guide breaks down three quick ways to adjust fields, roles, and access: direct edits on the User page, mass changes with Data Loader, and permission tweaks with Permission Set Groups. Pick the one that fits the moment and move on with confidence.
Table of Contents
Use Salesforce’s UI
Here, you’ll use the Salesforce UI to edit an existing user. The path follows Salesforce’s own documentation and works in both Lightning Experience and Classic.
1. Open Setup
- Click the gear icon (Lightning) or the Setup link (Classic) in the top-right corner.
- Choose Setup. Only admins or users with the Manage Users permission can continue.
2. Find the Users list
- In the Quick Find box on the left, type
Users. - Click Users. A table listing every active and inactive user appears.
3. Pick the user to change
- Scroll or use the search bar above the table to locate the person you want.
- Click Edit next to that user’s name. The full detail page opens in edit mode.
4. Update user information
Salesforce gives admins the option to tweak a surprisingly long list of user fields. The most common are:
- Name, Alias, Email, and Username
- Role and Profile (controls record access and permissions)
- User License (must match the license count you own)
- Locale, Time Zone, and Language
- Active checkbox (clear it to deactivate the account)
Tip from Salesforce docs: if you need to swap the Username or Email, make sure the new values are unique across the entire org.
5. Save your changes
- Click Save at the top or bottom of the page.
- If you changed the email address, Salesforce sends a confirmation link to the new inbox. The user must click it before the email switch completes.
6. (Optional) Freeze instead of deactivate
According to Salesforce, freezing keeps a user from logging in while you sort out ownership of their records.
- On the same Users table, click Freeze next to the user’s name.
- To unfreeze later, return and click Unfreeze.
7. Verify everything worked
- Return to the Users table. Your updated fields should display right away.
- Spot-check the user’s record access or login history if needed.
That’s it. You just edited a Salesforce user through the standard UI without touching code or external tools.
Use Torii
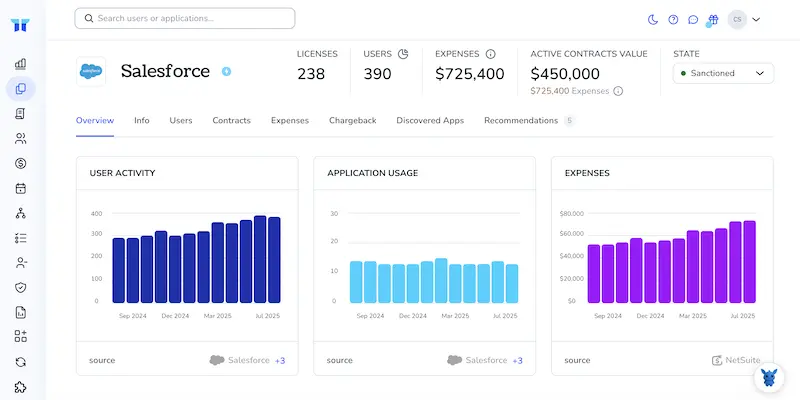
Instead of logging into Salesforce every time you need to adjust a user, handle the change through Torii, a SaaS management platform. These tools give you one dashboard for subscriptions and integrations, so you can onboard or offboard employees, check license details, and more.
Torii can handle user updates automatically once a defined trigger is met. Updates fire when events like a new hire, an employee departure, or a contract renewal occur, sparing you the repetitive clicks.
To modify Salesforce users from inside Torii, follow these straightforward steps outlined below to get started today:
1. Sign up for Torii
Reach out to Torii Sales for a complimentary two-week proof-of-concept to see the platform in action.
2. Connect your Salesforce account to Torii
Once your Torii workspace is active, connect it to your existing Salesforce instance by following Torii’s step-by-step integration guide.
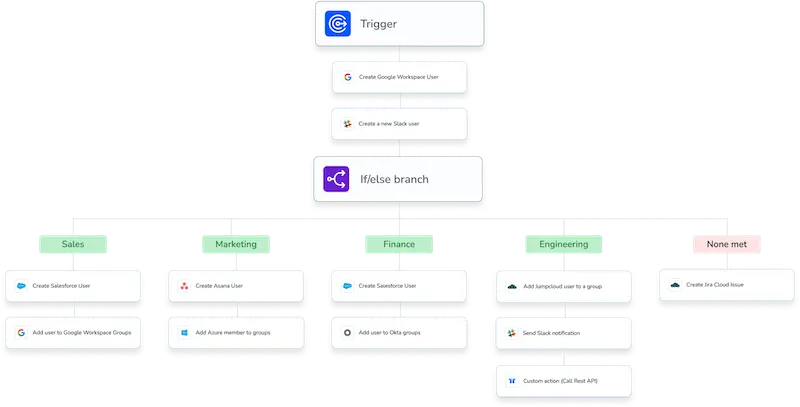
3. Create a Torii workflow for Salesforce
Inside Torii, open the Workflows tab, define a trigger, and add the action that updates users in Salesforce. Once saved, every time the trigger fires, Salesforce receives the change automatically.
Use Salesforce’s API
Here’s how you update an existing user record using Salesforce’s REST API, no clicks needed.
1. Get an access token
You need a fresh access token before changing any data. The OAuth 2.0 username-password flow is usually the fastest approach when you just want to script a call.
curl -X POST https://login.salesforce.com/services/oauth2/token \
-D "grant_type=password" \
-D "client_id=YOUR_CONNECTED_APP_CONSUMER_KEY" \
-D "client_secret=YOUR_CONNECTED_APP_CONSUMER_SECRET" \
-D "username=YOUR_USERNAME" \
-D "password=YOUR_PASSWORD+SECURITY_TOKEN"
The response returns an access_token and an instance_url; keep both handy because every later call relies on them.
2. Find the User record you want
If you already have the 15- or 18-character User Id, skip this query entirely. Otherwise, run a simple SOQL query to look it up by username, then copy the Id value from the JSON that comes back.
curl -H "Authorization: Bearer ACCESS_TOKEN" \
"${INSTANCE_URL}/services/data/v57.0/query?q=SELECT+Id,Username+FROM+User+WHERE+Username='[email protected]'"
3. Build the PATCH request
Place that Id in the request URL and include only the fields you intend to edit. In this example the last name changes and the user is deactivated. A 204 No Content status tells you Salesforce accepted the update.
curl -X PATCH \
-H "Authorization: Bearer ACCESS_TOKEN" \
-H "Content-Type: application/json" \
-d '{"LastName":"Carson","IsActive":false}' \
"${INSTANCE_URL}/services/data/v57.0/sobjects/User/0058c00001ABCDeFAA"
4. Confirm the change
Send a quick GET request afterward to confirm the record now holds the new values.
curl -H "Authorization: Bearer ACCESS_TOKEN" \
"${INSTANCE_URL}/services/data/v57.0/sobjects/User/0058c00001ABCDeFAA"
5. Handle errors fast
- 400 with
INVALID_FIELDusually means a typo in your JSON keys. - 403 with
INSUFFICIENT_ACCESSmeans the token’s user lacks the “Modify All Data” or “Manage Users” permission. - 404 means the Id wasn’t found (double-check uppercase/lowercase).
Fix the issue, resend the PATCH, and you’re done.
Torii for SaaS Management
If your team plans to tighten SaaS management processes, we should talk. Torii’s SaaS Management Platform enables you to:
- Spot hidden apps across every department and device in seconds: Continuous AI scans highlight unapproved tools the moment they show up.
- Trim wasted spend by flagging idle seats and overlap before renewals: Identify dormant licenses and duplicate products before they drain the budget.
- Automate every employee lifecycle task from hire to exit easily: Hand over onboarding, offboarding, and other repeatable workflows to the platform.
- Stay ahead of renewals with automatic, customizable reminders for every contract: Get alerts well before contracts expire so nothing slips through.
Torii pulls every SaaS detail into one place, giving Finance, IT, and Security the same accurate view.
For a closer look at the platform and real customer stories, visit Torii.
Frequently Asked Questions
You can update user records in Salesforce through the UI, using the API, or by leveraging Torii for automated updates based on triggers.
To update via the UI, go to Setup, find Users, select the user, edit details, and save changes. Optionally, freeze the user instead of deactivating.
Sign up for Torii, connect it to Salesforce, create a workflow with a trigger, and the user updates will occur automatically when the trigger fires.
To update a user via API, obtain an access token, find the user ID, build a PATCH request, and confirm the changes with a GET request.
If you encounter errors, check for typos in JSON, ensure proper permissions, and verify that the user ID is correct.
Yes, you can freeze a user to prevent login while maintaining ownership of their records without fully deactivating them.
