3 Ways to Assign Permission Sets to Salesforce in 2026

Moving from profile-heavy security to agile, task-based permissions can feel like a knot. Salesforce permission sets promise freedom, but only if they’re assigned in a smart, repeatable way.
Below, we’ll walk through three straightforward methods every admin should know, manual assignment, Permission Set Groups, and automation with Flow, so you can match access to roles without extra clicks.
Table of Contents
Use Salesforce’s UI
Here, you’ll use the Salesforce UI to give one or more users a permission set. Skip the API and add-ons. Everything happens with a few clicks in Lightning Experience.
Open Setup
- Click the gear icon in the upper-right corner of Salesforce.
- Pick Setup from the drop-down menu.
Find Permission Sets
- In the Quick Find box on the left, type
Permission Sets. - Click Permission Sets when seems.
Pick the Permission Set
- Scroll or use search to locate the permission set you need.
- Click its label to open the detail page.
Manage Assignments
- On the detail page, click Manage Assignments.
- Then click Add Assignments.
Select Users
- A list of active users appears. Check the box beside each person who needs the permission set.
- Use the View drop-down or search bar to filter the list if it’s long.
Assign and Confirm
- Click Assign. Salesforce displays a success message for every user.
- Click Done to wrap up.
Optional: Set or Remove Expiration Dates
- Still on Manage Assignments, locate the user in the list.
- Click Set Expiration Date to add a time limit, or Remove to revoke the set.
Use Torii
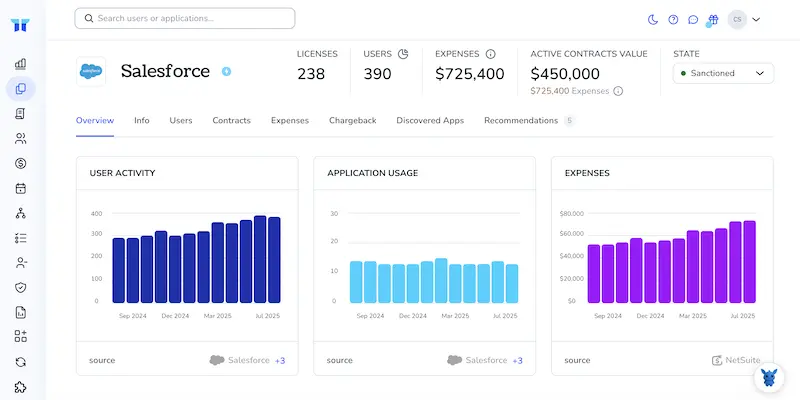
Using Torii instead of logging directly into Salesforce lets you assign permission sets from one SaaS management hub. SMPs pull all your SaaS apps into one view, so you can onboard or offboard staff, check license data, and tackle other routine chores in minutes.
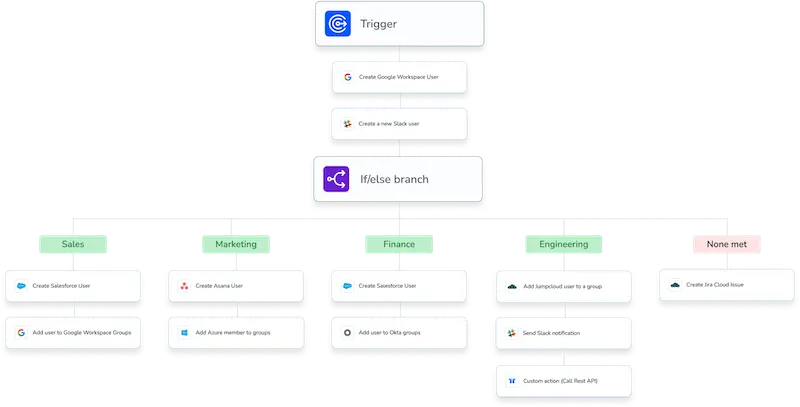
Torii turns a once manual Salesforce task into a hands-off workflow. After you define a trigger, such as a new hire, departing employee, or contract renewal, Torii updates the permission set automatically. Cutting those clicks gives your team back hours every month.
To push Salesforce permission sets via Torii, follow these instructions:
1. Sign up for Torii
Contact Torii to request a complimentary two-week proof-of-concept account.
2. Connect your Salesforce account to Torii
Once your Torii instance is active, link your existing Salesforce org to it. You can follow the detailed guide here: Salesforce Integration.
3. Create a Torii workflow for Salesforce
Inside Torii’s Workflows tab, create a new workflow. Choose the trigger you want, then add an action that assigns the appropriate permission set in Salesforce. From that point on, Torii will automatically update Salesforce whenever the trigger conditions are satisfied.
Use Salesforce’s API
You’ll use the Salesforce REST API to hand a user the right permission set with pure HTTP. No clicks, just calls.
1. Get an access token
Start by grabbing a fresh OAuth token from Salesforce because nothing else will work without it.
curl https://login.salesforce.com/services/oauth2/token \
-D "grant_type=password" \
-D "client_id=YOUR_CONSUMER_KEY" \
-D "client_secret=YOUR_CONSUMER_SECRET" \
-D "username=YOUR_USERNAME" \
-D "password=YOUR_PASSWORD_AND_SECURITY_TOKEN"
Copy the access_token and instance_url values from the response, then keep them nearby for the next calls.
2. Find the Permission Set ID
Query the PermissionSet object and filter by name so you pull back the exact record you need.
curl "$INSTANCE/services/data/v59.0/query" \
-H "Authorization: Bearer $TOKEN" \
-G --data-urlencode "q=SELECT Id FROM PermissionSet WHERE Name='API_Only_Access' LIMIT 1"
Write down the returned Id value because that long string is your PermissionSetId for later use.
3. Find the User ID
If the user’s 18-character Id isn’t handy, run a quick query and grab it right now.
curl "$INSTANCE/services/data/v59.0/query" \
-H "Authorization: Bearer $TOKEN" \
-G --data-urlencode "q=SELECT Id FROM User WHERE Username='[email protected]' LIMIT 1"
Save the Id that comes back and label it AssigneeId so you can reference it shortly.
4. Create the PermissionSetAssignment record
With both IDs in hand, insert a new PermissionSetAssignment record to link the user to the permission set.
curl "$INSTANCE/services/data/v59.0/sobjects/PermissionSetAssignment" \
-H "Authorization: Bearer $TOKEN" \
-H "Content-Type: application/json" \
-D '{
    "AssigneeId": "0058W00000ABC1234",
    "PermissionSetId": "0PS8W000007XYZ"
}'
A 201 response that includes a new id field confirms the assignment went through successfully on Salesforce.
5. Double-check your work
Run one more query against PermissionSetAssignment to prove that the record you just created really exists.
curl "$INSTANCE/services/data/v59.0/query" \
-H "Authorization: Bearer $TOKEN" \
-G --data-urlencode "q=SELECT Id, AssigneeId, PermissionSetId FROM PermissionSetAssignment WHERE AssigneeId='0058W00000ABC1234' AND PermissionSetId='0PS8W000007XYZ'"
If that query returns even a single row, Salesforce has already attached the permission set to the user.
Torii for SaaS Management
Ready to dig deeper into SaaS Management for your organization? Torii’s SaaS Management Platform helps you:
- Uncover shadow apps: AI continuously scans your organization to spot unapproved software the moment seems.
- Trim expenses: Reduce waste by deactivating idle licenses and consolidating overlapping tools.
- Automate onboarding and offboarding: Move repetitive IT tasks to workflows that save time and prevent errors.
- Avoid missed renewals: Receive alerts well before contracts expire.
Torii is the first end-to-end SaaS Management Platform, giving Finance, IT, and Security a single, reliable source of truth.
Find all the details at Torii and see the platform in action.
Frequently Asked Questions
You can assign access three ways: 1) in Lightning, open Setup → Permission Sets → Manage Assignments, choose users and click Assign; 2) bundle multiple sets into a Permission Set Group; 3) build a Flow that auto-grants the set when criteria match.
In Lightning, open the permission set, select Manage Assignments, click Add Assignments, tick the users, filter or search if needed, press Assign, then Done. Salesforce applies the set to every selected user at once, no code or add-ons required.
After connecting Salesforce to Torii, create a workflow, pick a trigger such as New Hire, and add the Assign Salesforce Permission Set action. Whenever the trigger fires, Torii calls Salesforce automatically and updates access without any manual clicks.
With REST, first obtain an OAuth token, query PermissionSet and User to capture their Ids, then POST a PermissionSetAssignment record containing AssigneeId and PermissionSetId. A 201 response confirms success, and a quick query can verify the link.
Yes. From Manage Assignments, locate the user, click Set Expiration Date, choose the date, and save. Salesforce revokes the permission set automatically when that day arrives, or you can click Remove at any time to revoke immediately.
Task-based permission sets give finer control than profile-heavy security, letting admins grant only what a role needs, adjust access quickly, and cut audit risk. They reduce excessive rights, speed onboarding and offboarding, and keep the org more secure.
