3 Ways to Enable Email Auto-Forwarding to Google Workspace

Juggling mailboxes is tiring. If you use Google Workspace, it’s smart to funnel everything into your Gmail inbox so nothing slips through and labels, filters, and auditing stay consistent. The key is picking the right forwarding path.
We’ll cover three options, when to use them, and trade-offs: source mailbox forwarding, Gmail’s POP3 mail fetch, and Workspace admin routing with aliases or Groups. You’ll keep clean delivery without breaking SPF, DKIM, or reply-to.
Table of Contents
Use Google Workspace’s UI
Here, you’ll use the Admin console to allow forwarding, then the user’s Gmail settings to turn it on. This follows Google’s own UI and labels.
Step 1: Allow automatic forwarding in the Admin console
If your org blocks forwarding, the user can’t turn it on. Google’s admin docs call this Automatic forwarding.
- Sign in at admin.google.com with an admin account.
- Go to Apps > Google Workspace > Gmail > End User access.
- Select the user’s organizational unit on the left, if needed.
- Find Automatic forwarding and turn it On.
- Click Save. Changes can take up to 24 hours, but it’s usually faster.
Step 2: Add and verify the forwarding address in Gmail
Google requires a quick verification so mail doesn’t get forwarded to the wrong place.
- Have the user sign in to Gmail on the web.
- Click the gear icon, then See all settings.
- Open the Forwarding and POP/IMAP tab.
- Click Add a forwarding address.
- Enter the destination email, click then Proceed, then OK.
- Google sends a confirmation to that address. Open that inbox and click the link in the message, or copy the code.
- Back in Gmail’s Forwarding and POP/IMAP tab, click Verify if prompted and finish verification.
Step 3: Turn on forwarding and choose what happens to the original
- Still on the Forwarding and POP/IMAP tab, select Forward a copy of incoming mail to and pick the verified address.
- Choose what should happen to the Gmail copy:
- Keep Gmail’s copy in the Inbox
- Mark Gmail’s copy as read
- Archive Gmail’s copy
- Delete Gmail’s copy
- Click Save Changes at the bottom.
Step 4: Test and confirm
- Send a test email to the user from a different account.
- Check the destination inbox and the user’s Gmail inbox to confirm the behavior you picked.
- If nothing forwards, refresh and wait a few minutes, then recheck that:
- The address shows as Verified in Gmail.
- Automatic forwarding is On for the user’s organizational unit.
Optional: Forward only certain messages
If the user wants only some mail forwarded, set a filter after verifying the forwarding address.
- In Gmail, click the search options icon in the search bar, add the criteria, then click Create filter.
- Check Forward it to and select the verified address.
- Click Create filter.
To turn it off later
- Go to Gmail settings > Forwarding and POP/IMAP.
- Select Disable forwarding.
- Click Save Changes.
Notes:
Forwarding applies to new incoming mail only. It won’t move old messages.
Use Torii
Instead of configuring Google Workspace by hand, you can rely on Torii, a SaaS Management Platform, to set up auto forwarding for user in Google Workspace. SMPs centralize your SaaS apps, licenses, and integrations in one place, making it simple to programmatically onboard/offboard employees, review subscription details, and more.
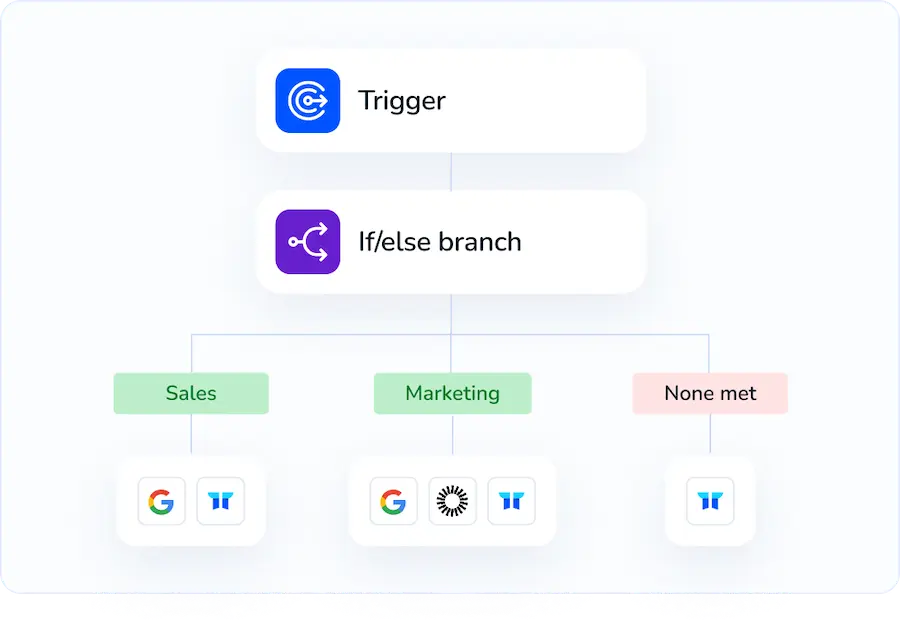
Compared to doing this manually inside Google Workspace, Torii lets you automate the step so it runs automatically whenever a defined trigger occurs. Triggers might include a new hire event, an employee departure, a contract renewal, and similar milestones. This saves time when the task needs to be repeated often.
To enable auto forwarding for user in Google Workspace directly from Torii, do the following:
1. Sign up for Torii
Contact Torii, and request a free two-week proof-of-concept.
2. Connect your Google Workspace account to Torii
After your account is active, connect Google Workspace to Torii (assuming you already have an account). Here are the instructions for the Google Workspace integration.

3. Create a Torii workflow for Google Workspace
Inside Torii, build an automated workflow to enable auto forwarding for user in Google Workspace. Go to the Workflows tab, define your trigger, and add an action that enables auto forwarding for user in Google Workspace. From then on, whenever the trigger fires, Torii will apply the change to Google Workspace.

Use Google Workspace’s API
Here, you’ll use the Gmail API to turn on auto-forwarding for a specific user. This path covers adding the forwarding address, waiting for verification, and enabling forwarding.
1) Get an access token with the right scope
You need an OAuth 2.0 access token that can manage Gmail forwarding settings. Use one of these approaches:
- End-user OAuth: the user signs in and grants consent.
- Domain-wide delegation: an admin uses a service account to impersonate the user.
Use this scope:
https://www.googleapis.com/Auth/Gmail.Settings.Sharing
Set userId to the user’s email address in each request. If you use end-user OAuth, you can use me.
2) Add the forwarding address (sends a verification email)
Use users.settings.forwardingAddresses.create to add the destination. Gmail will email that address for verification.
Example curl is:
curl -X POST \
-H "Authorization: Bearer ${TOKEN}" \
-H "Content-Type: application/json" \
"https://gmail.googleapis.com/gmail/v1/users/[email protected]/settings/forwardingAddresses" \
-D '{
    "forwardingEmail": "[email protected]"
}'
You’ll get a ForwardingAddress resource back with verificationStatus set to pending. The recipient must approve the request. You can’t enable auto-forwarding until the status is accepted.
3) Check verification status
Use users.settings.forwardingAddresses.get or .list to confirm the address is verified.
Example curl is:
curl -X GET \
-H "Authorization: Bearer ${TOKEN}" \
"https://gmail.googleapis.com/gmail/v1/users/[email protected]/settings/forwardingAddresses/[email protected]"
Look for verificationStatus. It must be accepted before the next step.
4) Turn on auto-forwarding to the verified address
Use users.settings.updateAutoForwarding to enable forwarding and choose what happens to the original message in the user’s inbox.
Allowed disposition values:
- LeaveInInbox
- Archive
- MarkRead
- Trash
Example curl is:
curl -X PUT \
-H "Authorization: Bearer ${TOKEN}" \
-H "Content-Type: application/json" \
"https://gmail.googleapis.com/gmail/v1/users/[email protected]/settings/autoForwarding" \
-D '{
    "enabled": true,
    "emailAddress": "[email protected]",
    "disposition": "leaveInInbox"
}'
5) Verify the setting
Use users.settings.getAutoForwarding to confirm it’s enabled and pointing to the right address.
Example curl is:
curl -X GET \
-H "Authorization: Bearer ${TOKEN}" \
"https://gmail.googleapis.com/gmail/v1/users/[email protected]/settings/autoForwarding"
You should see enabled: true, the forwarding email, and the chosen disposition.
6) Optional: turn it off or remove the address later
To disable forwarding but keep the address:
curl -X PUT \
-H "Authorization: Bearer ${TOKEN}" \
-H "Content-Type: application/json" \
"https://gmail.googleapis.com/gmail/v1/users/[email protected]/settings/autoForwarding" \
-D '{
    "enabled": false
}'
To remove the forwarding address:
curl -X DELETE \
-H "Authorization: Bearer ${TOKEN}" \
"https://gmail.googleapis.com/gmail/v1/users/[email protected]/settings/forwardingAddresses/[email protected]"
Frequently Asked Questions
There are three options: use the Google Workspace Admin console and the user’s Gmail forwarding settings, automate with Torii workflows, or enable forwarding via the Gmail API with appropriate OAuth scopes and verification. Choose based on scale and automation needs.
Use the Google Workspace UI for single users or occasional changes, Torii when you need repeatable automation across hires and offboards, and the Gmail API for programmatic control or custom integrations where granular scripting and domain-wide delegation are required.
Sign in at admin.google.com, go to Apps > Google Workspace > Gmail > End User access, select the user’s organizational unit, enable Automatic forwarding, and click Save. Changes can take up to 24 hours to propagate; usually they apply sooner.
In Gmail settings open Forwarding and POP/IMAP, click Add a forwarding address, enter the destination, then confirm the verification email sent to that address by clicking the link or copying the code back into Gmail to complete verification.
Create a Gmail filter using search options with your criteria, then choose Create filter and check Forward it to, selecting the verified forwarding address. Filters forward only new messages that match the rule; existing messages aren’t moved.
Forwarding can break SPF because forwarded mail may originate from different servers; DKIM usually survives unless messages are rewritten. To avoid issues, use admin routing, aliases or Groups, SMTP relay or SRS, and test message headers and reply behavior after setup.

