3 Ways to Create Groups in Google Workspace in 2026

Juggling team email threads, project files, and permissions can turn into its own full-time job. If your inbox already feels like a whiteboard covered in sticky notes, you’re not alone.
Google Workspace has a simple answer: groups. Build a single address, set who belongs, and the system does the routing and access control for you. In the guide below, you’ll see three quick ways to spin up a group and keep your crew synced.
Table of Contents
Use Google Workspace’s UI
This quick guide shows how to create a new email group in Google Admin. Everything happens in the web UI; no code needed.
Step 1 – Open the Admin console
- Go to
admin.google.comand sign in with an account that has Group creation rights. - Complete any 2-Step verification prompt.
Step 2 – Navigate to Groups
- On the Admin console homepage, select Directory in the left-hand menu.
- Click Groups. A list of existing groups (if any) appears.
Step 3 – Create the group
- Click the blue + Create group button.
- A setup panel slides in on the right.
Step 4 – Enter basic details
- Group name: the label users see in Gmail and the directory.
- Group email: something like
[email protected]. It must be unique. - Description: short purpose statement, optional but helpful.
- Click Next.
Step 5 – Set access options
- Decide who can view group members.
- Choose who can post messages (entire web, domain, or only group members).
- Pick how membership requests are handled.
- Click Next when done.
Step 6 – Add members and assign roles
- Type a user’s name or email, then pick from the dropdown.
- Use the role selector to mark each person as Owner, Manager, or Member.
- Leave this blank if you want to add people later.
- Click Add to group, then Done.
Step 7 – Finish up
- Review the summary screen.
- Click Create group. Google confirms creation.
- Close the panel to return to the Groups list, where the new group now appears.
Need edits later? Open Directory > Groups, click the group’s name, and adjust settings or members anytime.
Use Torii
Instead of opening Google Workspace’s admin console every time, use Torii, a SaaS management platform, to create groups in seconds. The platform gives IT one dashboard for all SaaS subscriptions and integrations, so teams can onboard or offboard users, track license data, and more without extra clicks.
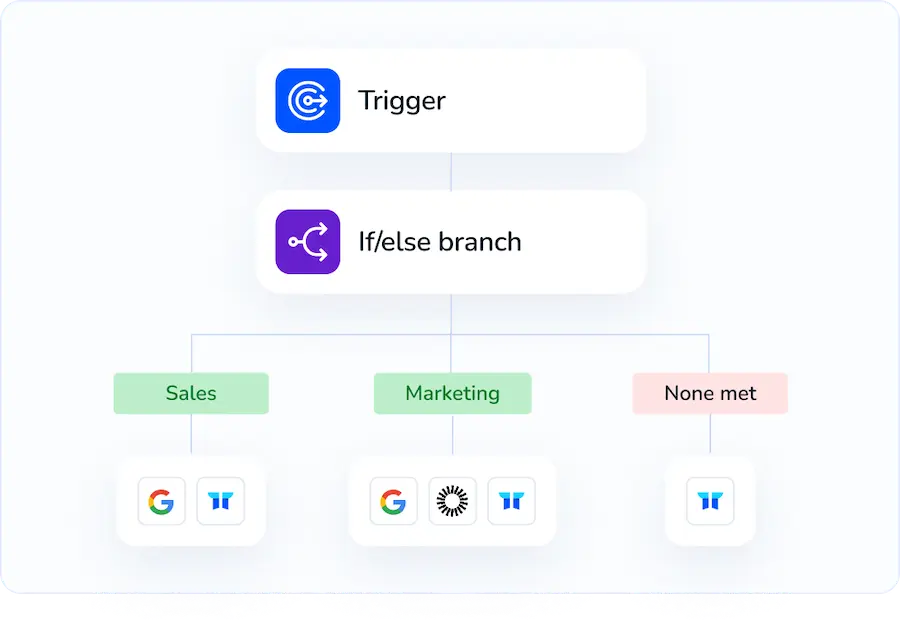
Torii can handle the entire group-creation process without human touch. Once a trigger fires, such as a new hire, a departure, or an expiring contract, the workflow handles the update automatically. Repetitive manual steps disappear when the event occurs often.
Follow these steps to set up automatic group creation in Google Workspace through Torii:
1. Sign up for Torii
Contact Torii and request a free, two-week proof of concept.
2. Connect your Google Workspace account to Torii
Once your Torii environment is live, connect your existing Google Workspace tenant. Follow the official instructions here: Google Workspace integration guide.

3. Create a Torii workflow for Google Workspace
In Torii, open the Workflows tab, set your trigger, and add an action that creates the needed group in Google Workspace. From that point onward, every time the trigger criteria are satisfied, Torii will automatically update Google Workspace.

Use Google Workspace’s API
This walkthrough shows how to create a Google Workspace group entirely through the Admin SDK Directory API.
1. Turn on the Directory API for your project
- In Google Cloud Console, make sure the Admin SDK is enabled.
- You’ll need this OAuth scope:
https://www.googleapis.com/auth/admin.directory.group
2. Grab an access token that can act as an admin
An account with super-admin rights must request the token.
- Create a service account in the same Cloud project.
- In the Admin console, grant that service account domain-wide delegation.
- When you ask for a token, impersonate a super-admin and include the group scope. Here’s a Python example that uses
google-auth:
from google.oauth2 import service_account
from google.auth.transport.requests import Request

SCOPES = ['https://www.googleapis.com/auth/admin.directory.group']
SERVICE_ACCOUNT_FILE = 'service-account.json'
ADMIN_USER = '[email protected]'
creds = service_account.Credentials.from_service_account_file(
SERVICE_ACCOUNT_FILE, scopes=SCOPES)
delegated_creds = creds.with_subject(ADMIN_USER)
delegated_creds.refresh(Request())
token = delegated_creds.token
print(token) # use this in the next call
3. Build the request body
Create a JSON payload that includes the group’s email address and name.
{
    "email": "[email protected]",
    "name": "Engineering",
    "description": "All engineers"
}
4. Call groups.insert
Send a POST request to the Directory endpoint. Example with cURL:
curl -X POST \
-H "Authorization: Bearer $TOKEN" \
-H "Content-Type: application/json" \
-D @group.json \
"https://admin.googleapis.com/admin/directory/v1/groups"
If you prefer Python:
import requests, json

headers = {
'Authorization': f'Bearer {token}',
'Content-Type': 'application/json'
}
body = {
'email': '[email protected]',
'name': 'Engineering',
'description': 'All engineers'
}
r = requests.post(
'https://admin.googleapis.com/admin/directory/v1/groups',
headers=headers,
data=json.dumps(body)
)
print(r.status_code, r.json())
5. Confirm the response
A 200 or 201 status code means the group exists. The response JSON includes the group’s unique ID; keep it for follow-up tasks such as adding members.
Torii for SaaS Management
Managing a growing stack of SaaS tools takes time and budget you probably don’t have. Torii shows you where to save both:
- Uncover shadow apps: AI works quietly in the background and flags unapproved tools as soon as they appear.
- Reduce spend: Identify idle licenses and overlapping services, then trim them before the next invoice hits.
- Automate onboarding/offboarding: Smart workflows pick up repeat tasks like account setup and shutdown, cutting manual clicks and errors.
- Never miss a renewal: Friendly reminders land well before each contract date so nothing slips by.
Torii brings Finance, IT, and Security together around a single, end-to-end view of every SaaS tool.
Learn more by visiting Torii.
Frequently Asked Questions
You have three ways to create a Google Workspace group: use the Admin console interface, automate it in Torii workflows, or call the Admin SDK Directory API. Each option sets the group email, members, and permissions in minutes.
The admin account needs the Google Workspace "Groups" creation privilege or super-admin status. Without it, the Create Group button disappears and API requests to groups.insert return 403. Always verify role settings before starting.
Yes. After connecting your Workspace tenant to Torii, you can build a workflow that triggers on events like new hires, departures, or contract renewals. Torii then creates, updates, or deletes the group automatically—no manual clicks required.
Google Workspace groups use three built-in roles: Owner, Manager, and Member. Owners control settings and membership, Managers moderate messages and approve requests, while Members can post and read according to the group’s access rules set during creation.
To create groups through the Admin SDK Directory API, include the scope "https://www.googleapis.com/auth/admin.directory.group" when requesting an access token. The token must impersonate a super-admin or delegated admin with group privileges, otherwise the insert call fails.
You decide posting permissions during group setup. In the Access Options screen, choose whether anyone on the web, only users in your domain, or just group members can send emails. Settings can be edited anytime from Directory > Groups.

