3 Ways to Add Users to Microsoft 365

Managing Microsoft 365 users can get tedious and error-prone, especially when you’re balancing permissions and licenses. I know that feeling.
This guide walks through three clear ways to add users: manually in the admin center, bulk import with a CSV, and scripted control with PowerShell. Pick the approach that matches your scale and how much admin control you need.
Table of Contents
Use Microsoft 365’s UI
Here, you’ll use the Microsoft 365 admin center to allow a user to sign in and give them any needed licenses so they can access services.
Sign in to the admin center
Go to admin.microsoft.com and sign in with an account that has admin rights (Global admin or User management admin).
Open Active users
- In the left menu, select Users, then Active users.
- Use the search box to find the person by name or email.
Open the user’s settings
- Click the user’s name to open their details pane.
- You’ll see tabs like Account, Licenses and apps, Roles, and Password.
Allow the user to sign in
- On the Account tab, look for Sign-in status or Block this user from signing in.
- Switch it to allow sign-in (uncheck the block option) and save the change.
Assign or check licenses
- Go to Licenses and apps in the same user pane.
- Click Edit, pick the required license(s) for email, Teams, OneDrive, etc., and save.
- Note: a user can be allowed to sign in but won’t get services until a license is assigned.
Reset the password if needed
- On the Password tab, choose Reset password to create a temporary password for the user.
- Share the temp password securely so they can sign in and set a new one.
Verify roles and MFA
- On the Roles tab, confirm the user has the correct role (User by default). Grant admin roles only when needed.
- If your organization requires multi-factor authentication, tell the user to expect an MFA setup step at first sign-in.
Quick checks and troubleshooting
- Have the user sign in at office.com to confirm access.
- If the sign-in option is grayed out or the account is synced from on-premises Active Directory, changes must be made in your local AD instead of the admin center.
- If something still blocks access, consult Microsoft’s admin center documentation on allowing or blocking sign-in and on assigning licenses for more detail.
Use Torii
Rather than administering users directly in Microsoft 365, you can use Torii, a SaaS Management Platform, to enable users in Microsoft 365. SMPs let teams centralize management of their SaaS subscriptions and integrations, making it possible to programmatically onboard/offboard people, inspect subscription details, and more.
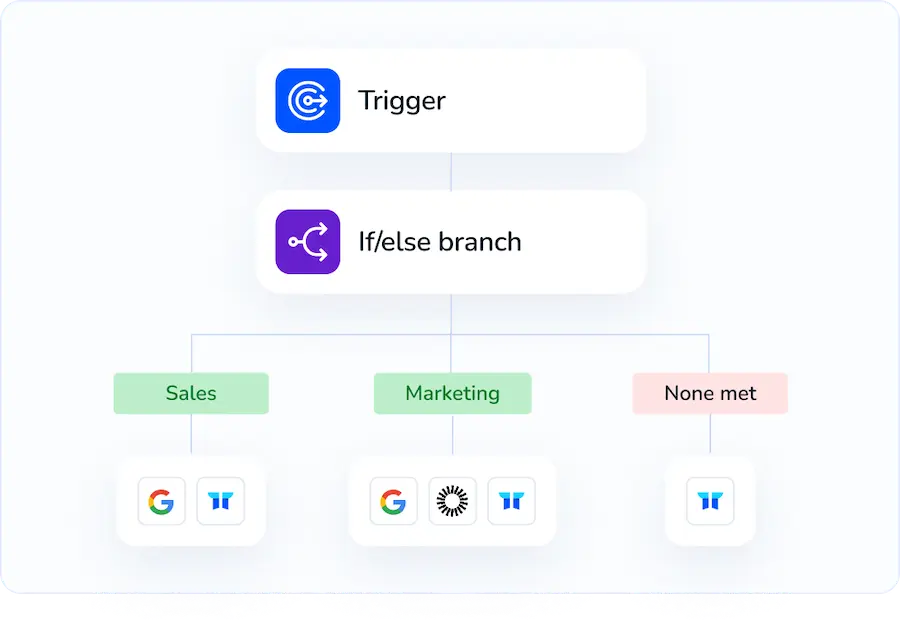
Instead of doing the Microsoft 365 steps by hand, Torii lets you automate the change so it occurs automatically whenever a trigger is met. Typical triggers include a new hire, an employee leaving, a contract renewal, etc. Automating this saves time when the task must be repeated often.
To enable a user in Microsoft 365 straight from Torii, follow these steps:
1. Sign up for Torii
Contact Torii, and ask for your free two-week proof-of-concept.
2. Connect your Microsoft 365 account to Torii
After your Torii account is active, connect Microsoft 365 to Torii (assuming you already have an account). Here are the instructions for the Microsoft 365 integration.

3. Create a Torii workflow for Microsoft 365
In Torii you can build automated workflows to enable a user in Microsoft 365. Open the Workflows tab, define a trigger, then add an action that will enable the user in Microsoft 365. Once configured, the integration will apply the change automatically whenever the trigger occurs.

Use Microsoft 365’s API
Here you’ll use the Microsoft Graph API to turn a disabled Microsoft 365 user account back on. The main action is updating the user’s accountEnabled property, plus a couple small checks and optional license assignment.
Prerequisites
- An Azure AD app registration with the right permissions. For app-only calls use
User.ReadWrite.All(application). For user-delegated calls useUser.ReadWrite.AllorDirectory.AccessAsUser.All(delegated). Admin consent is required for these scopes. - A valid OAuth 2.0 access token for Microsoft Graph.
Get an access token (example: client credentials)
Request a token from the Microsoft identity platform. Example curl for client credentials flow:
curl -X POST \
-H "Content-Type: application/x-www-form-urlencoded" \
-d "grant_type=client_credentials&client_id=YOUR_CLIENT_ID&client_secret=YOUR_CLIENT_SECRET&scope=https://graph.microsoft.com/.default" \
"https://login.microsoftonline.com/YOUR_TENANT_ID/oauth2/v2.0/token"
Save the returned access_token for the next calls.
Enable the user (PATCH accountEnabled)
Update the user resource to set accountEnabled to true. You can target the user by id or userPrincipalName.
Example request:
curl -X PATCH "https://graph.microsoft.com/v1.0/users/{user-id-or-upn}" \
-H "Authorization: Bearer ACCESS_TOKEN" \
-H "Content-Type: application/json" \
-d '{"accountEnabled": true}'
Expected result: 204 No Content or 200 OK depending on client. The user object is updated and the account is enabled.
Permissions needed: User.ReadWrite.All (app or delegated).
Optional: Assign a license if the user needs one
If the account needs a Microsoft 365 license to sign in to services, call the assignLicense action. You need the skuId for the license you want to add (see GET /subscribedSkus to list available SKU IDs).
Example:
curl -X POST "https://graph.microsoft.com/v1.0/users/{user-id}/assignLicense" \
-H "Authorization: Bearer ACCESS_TOKEN" \
-H "Content-Type: application/json" \
-D '{
    "addLicenses": [
        {
            "skuId": "YOUR_SKU_ID"
        }
    ],
    "removeLicenses": []
}'
Permissions needed: User.ReadWrite.All.
Verify the account is enabled
Get the user and check accountEnabled:
curl -H "Authorization: Bearer ACCESS_TOKEN" \
"https://graph.microsoft.com/v1.0/users/{user-id}?$select=id,userPrincipalName,accountEnabled"
The response should show "accountEnabled": true.
Notes
- Use
v1.0for production calls. The same endpoints are described in Microsoft Graph API docs under “Update user” and “assignLicense”. - If the account remains disabled after the update, check conditional access or sign-in block settings on the user or tenant.
Frequently Asked Questions
You can add users by signing into the Microsoft 365 admin center for single accounts, uploading a CSV for bulk onboarding, or scripting the process with PowerShell or Microsoft Graph. Choose the approach that matches your headcount and need for repeatable automation.
In the admin center, open Users ➜ Active users, select the person, go to the Account tab, clear the “Block sign-in” checkbox, and save. The change reactivates access immediately unless conditional access or on-premises sync still blocks the account.
From the same user pane, click Licenses and apps, hit Edit, tick the required SKU for Exchange, Teams, OneDrive, and save. Programmatically, call /users/{id}/assignLicense in Microsoft Graph, passing the skuId under addLicenses to grant service access.
Yes. After starting a Torii trial, connect your Microsoft 365 tenant, open Workflows, set a trigger like New Hire, and add the Enable Microsoft 365 User action. Torii then enables the account and assigns licenses automatically, eliminating repetitive manual clicks.
Send a PATCH to /v1.0/users/{id} with the body {\"accountEnabled\": true} and a Bearer token holding User.ReadWrite.All. A 204 response confirms success; if the user lacks services, follow up with the assignLicense endpoint using the correct skuId.
For app-only scripts grant User.ReadWrite.All application permission and give tenant-wide admin consent. Delegated flows can use User.ReadWrite.All or Directory.AccessAsUser.All. Without these scopes, Graph rejects calls that enable accounts, assign licenses, or change roles.

