3 Ways to Add Users to Groups in Microsoft 365

Adding users to groups in Microsoft 365 keeps permissions tidy and makes team access predictable. Whether you manage a small team or a growing org, clear group membership cuts down confusion and saves time.
Below are three practical methods , admin center, PowerShell, and Azure AD , with step-by-step guides so you can pick the best fit and keep roles aligned.
Table of Contents
Use Microsoft 365’s UI
Here, you’ll use the Microsoft 365 admin center UI to add one or more users to an existing group.
Step 1: Open the admin center
- Sign in and go to
admin.microsoft.com. - Make sure you have permission to change group membership (you must be an admin or a group owner).
Step 2: Find the group
- In the left menu choose Groups, then Active groups.
- Use the search box or scroll the list to find the group you want.
Step 3: Open the group and start adding members
- Click the group name to open its details.
- Select the Members tab.
- Click Add members.
Step 4: Select and add users
- Type a user’s name or email in the search box, then click the matching entry to add them.
- Repeat to add more users.
- Click Save or Add to confirm.
Step 5: Verify and note special cases
- Confirm new members appear in the group’s member list. They’ll get group messages or access depending on the group type.
- If the group is a dynamic group (membership set by rules), you can’t add members manually; the Membership type will show “Dynamic.”
- For external guests, invite them as guest users first, then add the guest account to the group like any other user.
Microsoft’s admin center docs cover these steps under topics like “Add or remove members from a Microsoft 365 group” and the guides for distribution and security groups if you need more detail.
Use Torii
Rather than managing group membership inside Microsoft 365 itself, you can use Torii, a SaaS Management Platform, to add user to groups in Microsoft 365. SMPs give teams a central place to handle SaaS subscriptions and integrations, letting you programmatically provision and deprovision users, inspect subscription details, and more.
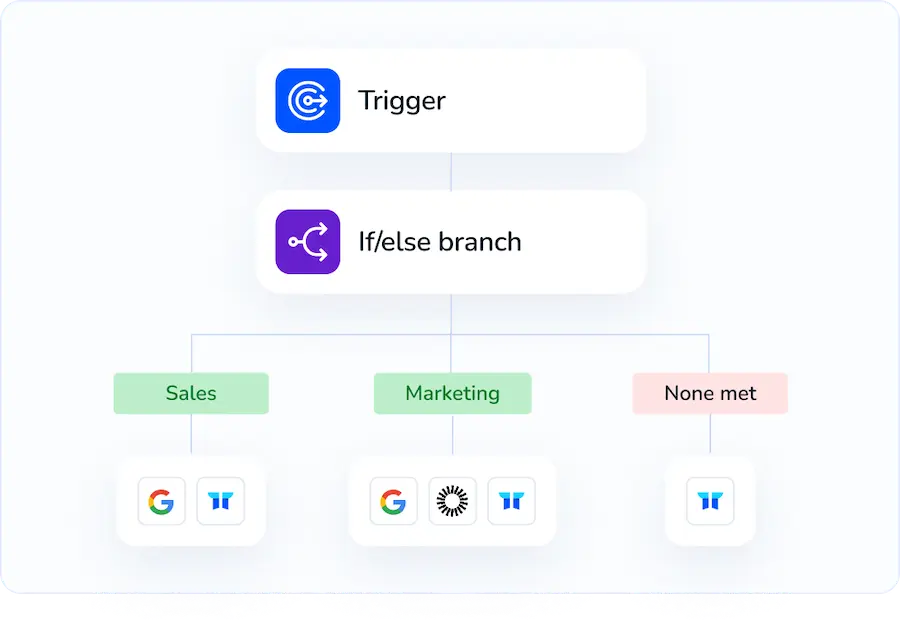
Instead of performing the task manually in Microsoft 365, Torii lets you automate it so the change happens automatically when a defined trigger occurs. Triggers can include a new hire, an employee departure, a contract renewal, or any other event - which can save significant time when this process is repeated often.
To add user to groups in Microsoft 365 from Torii, follow these steps:
1. Sign up for Torii
Contact Torii, and ask for your free two-week proof-of-concept.
2. Connect your Microsoft 365 account to Torii
After your Torii account is active, link your Microsoft 365 tenant to Torii (assuming you already have an M365 account). Here are the instructions for the Microsoft 365 integration.

3. Create a Torii workflow for Microsoft 365
In Torii, build an automated workflow that assigns users to Microsoft 365 groups. Go to the Workflows section, define the trigger event, and then add an action that places the user into the desired Microsoft 365 groups. Once the workflow is active, Torii will update Microsoft 365 whenever the trigger conditions are met.

Use Microsoft 365’s API
Here you’ll use the Microsoft Graph API to add a user to a group. All steps use Graph endpoints and OAuth 2.0 as shown in Microsoft’s API docs.
1. Get an access token (client credentials for app-to-app)
- Use the Azure AD token endpoint for your tenant.
- Required scope:
https://graph.microsoft.com/.default. App permissions commonly needed:GroupMember.ReadWrite.AllorDirectory.ReadWrite.All.
Example curl (replace tenant, client_id, client_secret):
curl -X POST "https://login.microsoftonline.com/{tenant-id}/oauth2/v2.0/token" \
-H "Content-Type: application/x-www-form-urlencoded" \
-D "grant_type=client_credentials&client_id={client-id}&client_secret={client-secret}&scope=https%3A%2F%2Fgraph.microsoft.com%2F.default"
The response includes access_token. Use it in the Authorization header for Graph calls.
2. Find the group and user object IDs
You need the group’s object id and the user’s object id (GUIDs). You can query Graph to find them by display name or email.
Example: get group by display name
curl -H "Authorization: Bearer {token}" \
"https://graph.microsoft.com/v1.0/groups?$filter=displayName eq 'My Group'"
Example: get user by userPrincipalName or mail
curl -H "Authorization: Bearer {token}" \
"https://graph.microsoft.com/v1.0/users/{userPrincipalName or user-id}"
3. Add the user as a member of the group
- Call the members ref endpoint. Use
POST /groups/{group-id}/members/$ref. - Request body uses an @odata.id pointing to the user object in Graph.
Example:
curl -X POST "https://graph.microsoft.com/v1.0/groups/{group-id}/members/$ref" \
-H "Authorization: Bearer {token}" \
-H "Content-Type: application/json" \
-d '{"@odata.id":"https://graph.microsoft.com/v1.0/users/{user-id}"}'
- A successful add typically returns HTTP 204 No Content.
- To add an owner instead, post to
/groups/{group-id}/owners/$refwith the same body.
4. Check membership first (optional but useful)
To avoid errors when the user is already a member, query current members and check for the user id.
Example:
curl -H "Authorization: Bearer {token}" \
"https://graph.microsoft.com/v1.0/groups/{group-id}/members"
Look for the user id in the response before posting.
5. Handle common errors
- 403 Forbidden: missing or insufficient permissions. Ensure the app has GroupMember.ReadWrite.All or Directory.ReadWrite.All.
- 404 Not Found: wrong group-id or user-id.
- 400 Bad Request when the user is already a member. Check membership before adding.
- Respect throttling: if you get 429, back off and retry.
6. Notes and best practices
- Use the v1.0 endpoint (
https://graph.microsoft.com/v1.0) for production. Beta exists but may change. - Decide between app-only (client credentials) and delegated flows depending on your scenario and permissions.
- Adding users to Microsoft 365 groups and security groups uses the same
groups/{id}/members/$refpattern. - Implement retries and error logging. Microsoft Graph enforces rate limits.
These steps follow the Microsoft Graph API patterns for authentication and for posting to /groups/{id}/members/$ref as detailed in Microsoft’s Graph API documentation.
Frequently Asked Questions
You have three ways to add users to Microsoft 365 groups: use the admin center interface, build an automated workflow in Torii, or call Microsoft Graph’s /groups/{id}/members/$ref endpoint. Pick the option that fits your volume, automation needs, and admin rights.
Yes. In the Microsoft 365 admin center, open Groups → Active groups, select the group, choose Members, click Add members, search names or emails, tick several entries, then Save. All selected users are added in one confirmation.
Torii connects to your Microsoft 365 tenant, lets you define a trigger—such as onboarding, off-boarding or renewal—and adds the \"Add user to group\" action inside a workflow. Once published, Torii automatically updates the chosen groups whenever the trigger fires.
Use POST /groups/{group-id}/members/$ref on Microsoft Graph. Supply an access token with GroupMember.ReadWrite.All scope, and pass a JSON body containing an @odata.id pointing to the user, e.g., https://graph.microsoft.com/v1.0/users/{user-id}. A 204 response confirms success.
Dynamic groups fill themselves based on attribute rules, so manual additions are blocked. The admin center labels the membership type as Dynamic, and Graph rejects direct inserts. Edit the rule or convert the group to static if you need manual control.
For app-only calls you must grant GroupMember.ReadWrite.All or Directory.ReadWrite.All application permissions and request the https://graph.microsoft.com/.default scope. Delegated flows need Group.ReadWrite.All. Missing or lesser rights cause a 403 Forbidden when you attempt to add members.

