3 Ways to Add Users to Microsoft 365 in 2026

Adding people to Microsoft 365 shouldn’t feel like a maze. Whether you run a small team or manage a growing tenant, the job comes down to picking the right tool and getting every detail in fast.
Below, we break down three proven routes, Admin Center, PowerShell, and bulk import, so you can match the task to your day and your comfort level. Pick one and you’ll be adding accounts in minutes.
Table of Contents
Use Microsoft 365’s UI
You’ll use the Microsoft 365 admin center to add a new user account from start to finish.
Step 1: Sign in to the admin center
Open admin.microsoft.com and sign in with an account that holds User administrator or Global administrator rights.
Step 2: Open Active users
- In the left navigation pane, pick Users, then choose Active users.
- This list shows everyone who already has an account.
Step 3: Launch the Add a user wizard
- Select Add a user at the top of the page.
- A side panel then steps you through a few screens.
Step 4: Enter basic info
- Fill in First name, Last name, Display name, and Username.
- If your tenant has more than one domain, pick the right domain from the drop-down list.
Step 5: Set the password
- Keep Auto-generate password checked for a random strong password, or clear the box to type your own.
- Unless you have a reason otherwise, leave Require this user to change their password when they first sign in selected.
Step 6: Assign product licenses
- On the Product licenses screen, flip the toggle on for each license the user needs, such as Microsoft 365 Business Standard.
- If you run out of licenses, the wizard shows a warning so you can buy more or unassign one elsewhere.
Step 7: Pick optional settings
- Roles: Keep the default User role or improve permissions by selecting something like Global admin.
- Profile info: Add details such as Job title or Department if you want them to appear in the address book.
Step 8: Review and finish
- The Review and finish page summarizes everything.
- Click Finish adding to create the account.
Step 9: Share the credentials
- Copy the password or download it as a CSV file.
- The wizard can also send sign-in details to your email so you can forward them securely.
That’s it. The new user can now sign in, change their password if prompted, and start using Microsoft 365 apps and services.
Use Torii
Instead of manually working inside Microsoft 365, you can use Torii, a SaaS Management Platform (SMP), to set up users in Microsoft 365. An SMP gives you one place to manage SaaS subscriptions and integrations, so you can programmatically onboard or offboard users, review license details, and more.
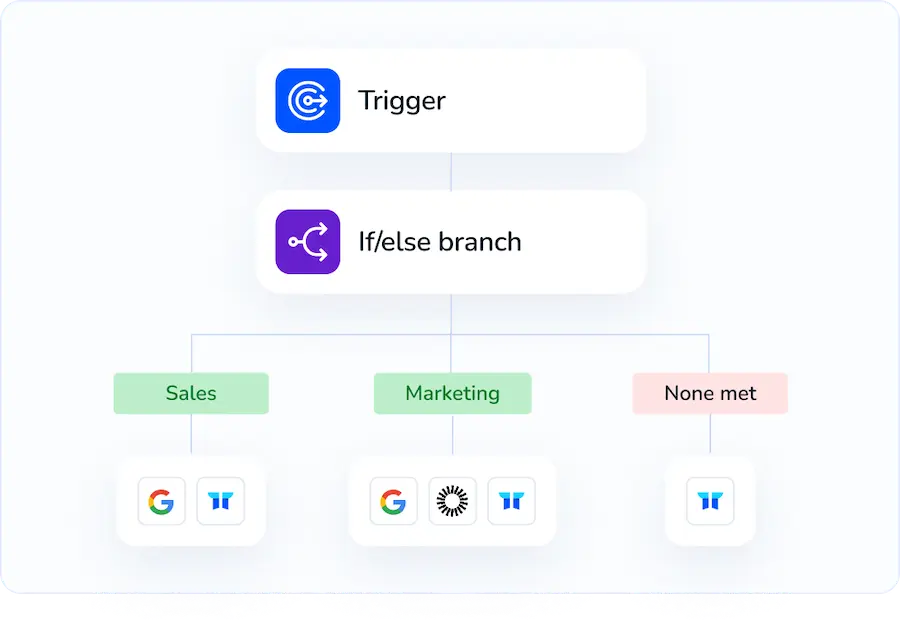
When you add Torii to the mix, the user-creation process becomes fully automated. Once you define a trigger such as a new hire, an employee exit, or a contract renewal, Torii performs the task automatically, eliminating repetitive manual steps and saving valuable time.
To add a user to Microsoft 365 directly from Torii, follow the three steps outlined below:
1. Sign up for Torii
Reach out to the Torii team and request a free two-week proof-of-concept to test the platform.
2. Connect your Microsoft 365 account to Torii
After your Torii instance is active, connect your existing Microsoft 365 tenant and follow the detailed instructions linked below to finish the integration: Here are the instructions for the Microsoft 365 integration.

3. Create a Torii workflow for Microsoft 365
Navigate to the Workflows tab in Torii, choose your trigger, and add an action that creates a user in Microsoft 365. From then on, whenever the trigger fires, Torii will automatically update Microsoft 365 for you.

Use Microsoft 365’s API
Follow these steps to spin up a user account through Microsoft Graph, Microsoft 365’s REST API.
1. Give your app the right permissions
- In Azure Portal, open your registered app.
- Add the
User.ReadWrite.Allapplication permission under Microsoft Graph. - Grant admin consent so the scope is active.
2. Grab an access token
Send a POST request to the token endpoint.
POST https://login.microsoftonline.com/{tenant-id}/oauth2/v2.0/token
Content-Type: application/x-www-form-urlencoded
client_id={app-id}
&scope=https%3A%2F%2Fgraph.microsoft.com%2F.default
&client_secret={client-secret}
&grant_type=client_credentials
Copy the access_token field from the JSON response.
3. Build the user object
Here’s the minimum JSON Microsoft Graph needs:
{
    "accountEnabled": true,
    "displayName": "Jenna Ortega",
    "mailNickname": "jenna",
    "userPrincipalName": "[email protected]",
    "passwordProfile": {
        "forceChangePasswordNextSignIn": true,
        "password": "R@ndomP4ss."
    }
}
Swap in values that match your tenant and password requirements.
4. Send the create request
POST https://graph.microsoft.com/v1.0/users
Authorization: Bearer {access_token}
Content-Type: application/json
{ .user object from step 3. }
A 201 response with the new user object confirms success.
5. Check the result
Quick confirmation:
GET https://graph.microsoft.com/v1.0/users/[email protected]
Authorization: Bearer {access_token}
The full profile should appear, proving the account is live.
That’s it. You added a user through the Microsoft 365 API without touching the portal.
Torii for SaaS Management
Gain full visibility and control over every app in your SaaS stack. Torii’s SaaS Management Platform lets you:
- Uncover shadow apps: Our discovery engine runs in the background and flags unapproved tools as soon as they appear.
- Reduce spend: Spot unused licenses and overlapping tools, then trim the fat from your SaaS budget.
- Automate onboarding/offboarding: Hand off the repetitive onboarding and offboarding tasks so your team stops fighting spreadsheets.
- Never miss a renewal: Get a heads-up before any contract renews, giving you time to renegotiate or walk away.
Torii brings Finance, IT, and Security into one view, turning scattered data into a single source of truth.
Take a closer look and book a demo at Torii.
Frequently Asked Questions
You have three straightforward options for adding users in Microsoft 365: use the Admin Center wizard, automate the process with Torii workflows, or send a POST request to Microsoft Graph. Pick the route that matches your technical comfort and the task’s scale.
In the Microsoft 365 admin center you must sign in with either the Global administrator role or the User administrator role. Without one of those permissions, the Add a user wizard and license toggles remain unavailable.
During creation you enter first name, last name, display name, username with correct domain, and a password (auto-generated or custom). You can also assign product licenses and optionally add job title, department, or elevated roles.
Yes. Connecting Microsoft 365 to Torii lets you build a workflow that fires on triggers such as new-hire alerts, automatically creating accounts, assigning licenses, and sending credentials—no manual clicks or PowerShell scripts required.
First grant your Azure AD app the \"User.ReadWrite.All\" permission and obtain an OAuth token. Build a JSON user object with displayName, mailNickname, userPrincipalName, passwordProfile, and accountEnabled fields, then POST it to https://graph.microsoft.com/v1.0/users. A 201 response confirms success.
The Add a user wizard flags a shortage instantly. You can pause and purchase additional seats, reassign existing licenses, or finish account creation without a license and return later once capacity is available.

