3 Ways to Reactivate Users in Zoom

Lost access or need to bring team members back into Zoom? Reactivating users doesn’t have to be a headache.
This guide walks through three practical methods, account settings, user roles, and bulk import tools, so you can pick the approach that fits your admin workflow and restore access quickly. Follow the step-by-step section next for clear actions.
Table of Contents
Use Zoom’s UI
Here you’ll use the Zoom web portal to find a deactivated account and turn it back on so the user can sign in and use Zoom again.
Open the Zoom web portal
Sign in to the Zoom web portal with an admin account that has user management privileges.
Go to the Users page
From the left menu, choose User Management, then Users.
Find the inactive user
- Use the Status filter and select Inactive to show deactivated accounts.
- Or type the user’s name or email into the search box and press Enter.
Reactivate the user
- In the user’s row, click More (or the Actions dropdown) and choose Reactivate.
- In the confirmation dialog, review any options and click Reactivate to confirm.
Check license and settings after reactivation
- Find the reactivated user and click Edit to:
- Set the user type (Basic or Licensed).
- Assign a role or group if needed.
- If you don’t have a free license available, free one up or change the user to Basic.
Quick troubleshooting tips
- If you don’t see Reactivate, confirm you signed in with an admin role that can manage users.
- If the user doesn’t appear under Inactive, they may have been removed from the account instead of deactivated; check account deletion logs or your organization’s records.
Use Torii
Rather than working inside Zoom itself, you can use Torii, a SaaS Management Platform, to reactivate a user in Zoom. SMPs centralize management of SaaS apps and subscriptions, letting you programmatically onboard/offboard people, review license details, manage integrations, and more.
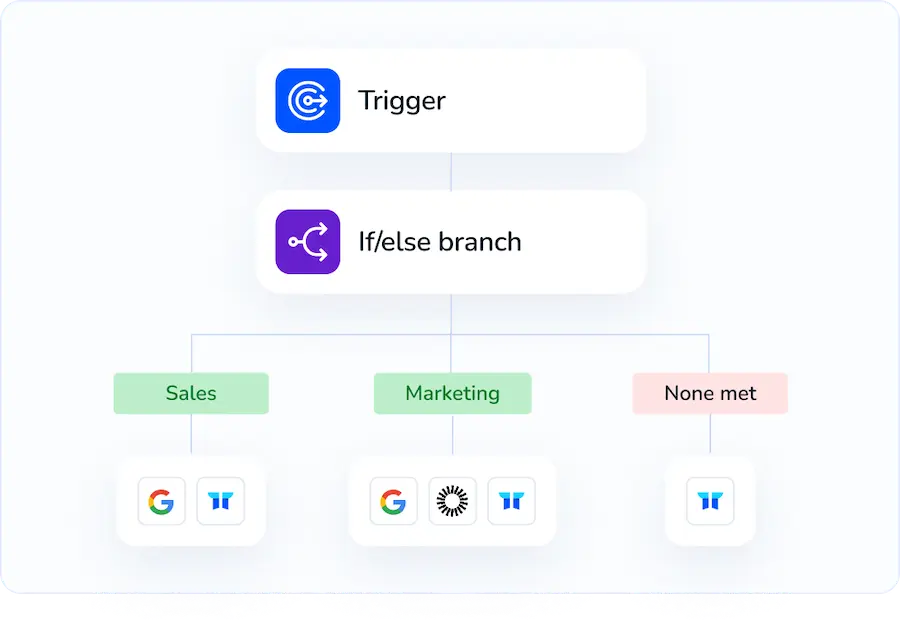
Instead of performing the reactivation manually in Zoom every time, Torii lets you automate the step so it runs whenever a condition is met. Typical triggers include onboarding a new hire, processing an employee departure, a contract renewal, etc. Automating this frees up time when the same action must be repeated often.
To reactivate a user in Zoom directly from Torii, do the following:
1. Sign up for Torii
Contact Torii, and request your complimentary two-week proof-of-concept.
2. Connect your Zoom account to Torii
After your Torii account is active, link your Zoom account (assuming you already have one). Here are the instructions for the Zoom integration.

3. Create a Torii workflow for Zoom
In Torii you can build automated workflows to reactivate a user in Zoom. Open the Workflows tab, define the trigger you want, then add an action that performs the Zoom reactivation. Once configured, the workflow will update Zoom automatically whenever the trigger occurs.

Use Zoom’s API
Here you’ll call Zoom’s API to change a deactivated user back to active. The API endpoint is a PUT to /users/{userId}/status with action=reactivate and requires a valid Bearer token.
Prepare authentication
Use a valid Zoom OAuth access token or JWT in the Authorization header. The token must include scopes that allow updating users (for example, user:write or admin-level user write scopes).
- Headers to include:
Authorization: Bearer YOUR_ACCESS_TOKENContent-Type: application/json
Identify the user
The {userId} path parameter accepts the user’s Zoom ID or their email address. Pick whichever you have available and URL-encode it if needed.
Call the Reactivate endpoint
Example curl is:
curl -X PUT "https://api.zoom.us/v2/users/{userId}/status?action=reactivate" \
-H "Authorization: Bearer YOUR_ACCESS_TOKEN" \
-H "Content-Type: application/json"
No request body is required for this call.
Interpret the response
- A successful reactivation returns HTTP 204 No Content.
- On error you’ll get a 4xx/5xx response with a JSON body that includes
codeandmessagefields describing the problem.
Verify the user is active
You can confirm the change with a GET to the user resource.
Example curl is:
curl -X GET "https://api.zoom.us/v2/users/{userId}" \
-H "Authorization: Bearer YOUR_ACCESS_TOKEN" \
-H "Content-Type: application/json"
Look for the account fields (such as status or similar) in the returned JSON to confirm the user is now active.
Frequently Asked Questions
You have three ways to restore access: turn the account back on in Zoom's Users page, set up an automated workflow in Torii, or send a PUT request to /users/{userId}/status?action=reactivate through Zoom's API. Pick whichever suits your admin process.
Sign in with a role that includes user management privileges—Owner, Admin, or a custom role with the user:write scope. Without those rights, the Users page will hide the "Reactivate" link and Zoom's API calls will return a 401 or 403 error.
After connecting Zoom to Torii, create a workflow that triggers on events like New Hire, Department Change, or Contract Renewal, then add the "Reactivate Zoom User" action. Torii will automatically call Zoom's API, relicense the account, and notify stakeholders.
Send a PUT request to https://api.zoom.us/v2/users/{userId}/status with the query parameter action=reactivate. Include an Authorization header bearing an OAuth or JWT token that has user:write scope. A successful call returns HTTP 204 and no body.
The button disappears when you log in with a role lacking user management rights, when the account is already active, or when the user was permanently removed instead of deactivated. Check audit logs, ensure you selected Status = Inactive, and confirm license availability.
Open the user's profile, choose Basic or Licensed, assign the correct role or group, and verify any add-ons. If no paid licenses remain, downgrade to Basic or free one up; otherwise the user may be reactivated but unable to host meetings.

