3 Ways to Deactivate Users in Zoom

Managing Zoom users means balancing easy collaboration with tight security. Deactivating accounts when people leave or change roles keeps meetings and data safe while simplifying billing and licenses.
In the next section I’ll walk through three ways to deactivate users, bulk, individual, and automated, so you can pick the method that fits your org’s size, policies, and workflows.
Table of Contents
Table of Contents
Use Zoom’s UI
Here, you’ll use the Zoom web portal to find a user and deactivate their account so they can no longer sign in and their license is returned to the account.
Sign in as an admin
Sign in to the Zoom web portal with an account owner or admin role that can manage users.
Open the Users page
From the left navigation, click User Management then Users.
Find the user
- Use the search box to type the user’s name or email.
- You can also filter by role or status if needed.
- When you see the user in the list, either:
- Click the user’s row to open their profile, or
- Use the
Moremenu on the right side of the user’s row.
Deactivate the user
- In the profile or
Moremenu, chooseDeactivate. - When prompted, choose what to do with the user’s content:
- Transfer scheduled meetings to another user
- Transfer cloud recordings and webinar assets
- Do not transfer (leave assets as-is)
- Confirm the deactivation in the dialog.
Verify the result
- The user row should now show a
Deactivatedstatus or appear in the deactivated list. - The license previously assigned to that user should be freed for reassigning.
Reactivate later (if needed)
- If you need the account back, filter or search for deactivated users on the same
Userspage. - Open the user’s profile or
Moremenu and chooseReactivate, then confirm.
If you run into an option you don’t see, check that you have the right admin role or contact the account owner - some controls are only available to certain admin types.
Use Torii
Rather than handling the change inside Zoom, you can use Torii, a SaaS Management Platform, to deactivate user in Zoom. SMPs let organizations centralize their SaaS subscriptions and connected apps, making it straightforward to programmatically provision/deprovision users, view subscription details, and more.
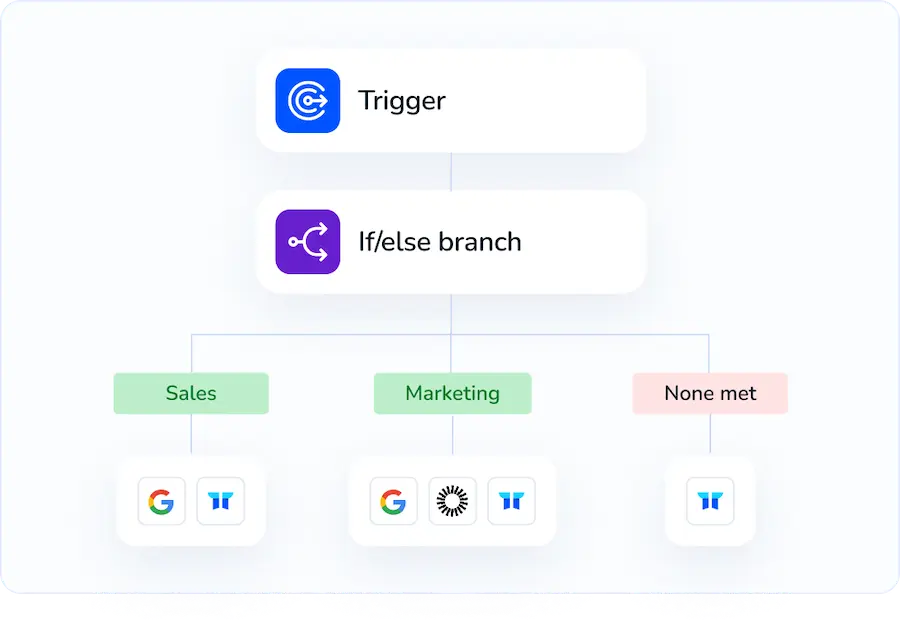
Instead of performing the step manually in Zoom, Torii allows you to automate deactivation so it runs automatically when a defined trigger happens - for example: a new hire, an employee leaving, or a contract renewal. Automating this removes repetitive manual work and saves time when this action is needed often.
To deactivate user in Zoom straight from Torii, follow these steps:
1. Sign up for Torii
Reach out to Torii and request your complimentary two-week proof-of-concept.
2. Connect your Zoom account to Torii
After your Torii account is active, integrate Zoom (assuming you already have a Zoom account). Here are the instructions for the Zoom integration.

3. Create a Torii workflow for Zoom
In Torii you can build an automated workflow that deactivates user in Zoom. Go to the Workflows tab, define the trigger you want, then add an action that deactivates the Zoom user. Once saved, the workflow will update Zoom automatically whenever the trigger criteria are met.

Use Zoom’s API
Here you’ll use Zoom’s API to deactivate a user account. This walk-through follows Zoom’s API steps for updating a user’s status.
Prepare authentication and permissions
- Obtain an access token (OAuth or account-level token) and make sure it includes the scope needed to change user status.
- Required scope: the account needs a scope that allows user write operations (for admin actions, the admin-level user write scope is required).
- Put the token in the Authorization header as
Bearer {access_token}.
Find the user identifier
- The status update endpoint requires a user identifier in the path; you can use the user’s Zoom userId or their email address.
- If you don’t have the userId, use the Users API (per Zoom docs) to look it up by listing or searching users.
Call the update-status endpoint
Example curl request:
curl -X PUT "https://api.zoom.us/v2/users/{userId}/status" \
-H "Authorization: Bearer {access_token}" \
-H "Content-Type: application/json" \
-d '{"action":"deactivate"}'
- Replace
{userId}with the userId or email, and{access_token}with a valid token. - The request body is JSON with a single field:
actionset todeactivate.
Check the response and handle errors
- On success you will get the HTTP status Zoom returns for a successful state change (check the API docs for the exact code returned).
- Common errors and what they mean:
- 401: invalid or expired token - refresh or reissue the token.
- 403: insufficient permissions or scope - ensure the token has the required user write/admin scope.
- 404: user not found - verify the userId or email.
- Respect Zoom rate limits; if you hit limits, back off and retry per the docs.
Confirm downstream effects
Deactivation may affect the user’s scheduled meetings, recordings, and licensing. Check Zoom’s API docs for endpoints to manage meetings, recordings, or license reassignment if you need to handle those via API after deactivation.
Frequently Asked Questions
You have three ways to deactivate a Zoom user: use the web portal’s Users page to click Deactivate, run an automated workflow in Torii, or call Zoom’s /users/{id}/status API with action set to deactivate. Pick the route that best fits your tooling.
Once a user is deactivated, Zoom immediately releases their paid license back to the pool. Admins can reassign that seat to another employee without buying more subscriptions, helping control costs and keeping license counts aligned with active head-count.
Yes. From the Users page you can select multiple rows and choose Deactivate, or in Torii build a workflow that targets several accounts at once. For developers, script a loop that calls the update-status API for each user you need to disable.
After connecting Zoom to Torii, you define a workflow trigger—such as employee off-boarding—then add the "Deactivate Zoom user" action. When the trigger fires, Torii calls Zoom’s API behind the scenes, removing access and reclaiming the license with no manual clicks.
Use the PUT request to /v2/users/{userId}/status with a JSON body {"action":"deactivate"}. Authenticate with an OAuth or account-level token that has user:write permissions. A 204 or similar success code confirms the account is disabled.
Yes. In the Zoom portal switch the status filter to Deactivated, open the user’s profile or More menu, and click Reactivate. Through API or Torii you can send the complementary update-status call with {"action":"activate"} to restore access and licenses.
Frequently Asked Questions
You have three options to deactivate users in Zoom — via Zoom web portal (UI), via an SMP like Torii to automate workflows, or programmatically with Zoom's API. Pick based on org size, policies, and whether you need bulk or automated deprovisioning.
Sign in to the Zoom web portal as an owner or admin, open User Management → Users, locate the user, choose Deactivate from their profile or More menu, select transfer options for meetings/recordings, then confirm. License is freed upon success.
Torii centralizes SaaS management so you can integrate Zoom, create workflows triggered by HR or lifecycle events, and automatically deactivate users. Sign up for a trial, connect Zoom, define trigger and deactivation action to remove accounts and reclaim licenses.
Get an OAuth or account access token with user-write/admin scope, find the user's Zoom userId or email, then send PUT to /v2/users/{userId}/status with JSON body {\"action\":\"deactivate\"}. Handle 401/403/404 and rate limits per Zoom docs.
Deactivation can remove a user's sign-in and free licenses; meetings, cloud recordings, and webinar assets can be transferred to another user or left as-is. Verify downstream effects and use Zoom API endpoints to reassign meetings or recordings if needed.
On the Users page filter or search for deactivated users, open the user's profile or More menu, choose Reactivate, and confirm. The account is restored and a license can be reassigned; ensure you have the proper admin role to perform reactivation.

