3 Ways to Add a User to a Group in Jira

Managing access in Jira can feel fiddly when teams grow. Groups drive permissions, notifications, and project access, so adding a user to the right group is key to consistent onboarding, minimal access, and clear control.
This guide shows three practical ways to add a user to a group and explains when each method fits. You’ll learn fast paths for onboarding, safe updates during role changes, and options that minimize permission drift.
Table of Contents
Use Jira’s UI
Here, you’ll use Jira’s UI to add people to a group. These steps cover Jira Cloud and Jira Data Center/Server.
Confirm your Jira edition and your permissions
- Check which edition you’re on:
- Cloud: your site URL usually ends with atlassian.net, and user management happens at admin.atlassian.com.
- Data Center or Server: your site runs on your own domain, and user management is inside Jira’s admin pages.
- Make sure you have the right admin role:
- Cloud: site admin or organization admin. Group admins can add members to groups they manage.
- Data Center or Server: Jira Administrators or Jira System Administrators.
- Atlassian doc titles to look up if needed: Manage groups in Atlassian admin, Admin permissions in Atlassian admin, Managing users and groups.
Jira Cloud: Add a user to a group from Atlassian admin
- Go to admin.atlassian.com and choose your organization.
- Open Directory, then Groups.
- Find and select the group.
- Click Add members or Add people.
- Search by name or email, select the person, then Add.
- Confirm they appear in the group’s Members list.
- Helpful doc titles: Manage groups in Atlassian admin, Add people to groups.
Jira Cloud: Make sure the group grants Jira product access
Adding someone to a group only gives Jira access if that group is tied to the product.
- In Atlassian admin, open Products, then Product access.
- Under Jira Software, Jira Service Management, or Jira Work Management, make sure your group is listed as an access group.
- If it is not, add the group to the product’s access list or use a different group that already grants access.
- Check license seats before you add large groups.
- Helpful doc titles: Give product access to a group, Control product access.
Jira Cloud: Add a user to a group from the user’s profile (quick for one-offs)
- In Atlassian admin, open Directory, then Users.
- Select the user.
- In the Groups section, choose Add to group, pick the group, then Add.
- Confirm the group shows on their profile.
- Helpful doc title: Manage users in Atlassian admin.
Jira Data Center or Server: Add a user to a group in Jira’s admin
- In Jira, select the cog icon, then User management.
- Open Groups, then select the group.
- Click Add users to group.
- Search by username or email, select the user, then Add.
- Confirm the user appears in the group’s members.
- Alternate path:
- Go to Users, find and open the user.
- Use Add to group, choose the group, then Add.
- Helpful doc titles: Managing users and groups, Managing groups.
Common snags to watch for
- External directory control: If your users or groups sync from an external directory like Azure AD or LDAP, the Add button may be disabled. You will need the change made in that directory.
- Wrong group: Some groups do not grant Jira access. If the user still cannot log in, check Product access and add the group there.
- Name vs email: On Data Center or Server, you may need the username, not just the email.
Use Torii
Instead of doing this directly in Jira, you can use Torii, a SaaS Management Platform, to add user to group in Jira. SMPs centralize the management of SaaS apps and integrations so you can programmatically onboard/offboard users, review subscription details, and more-all in one place.
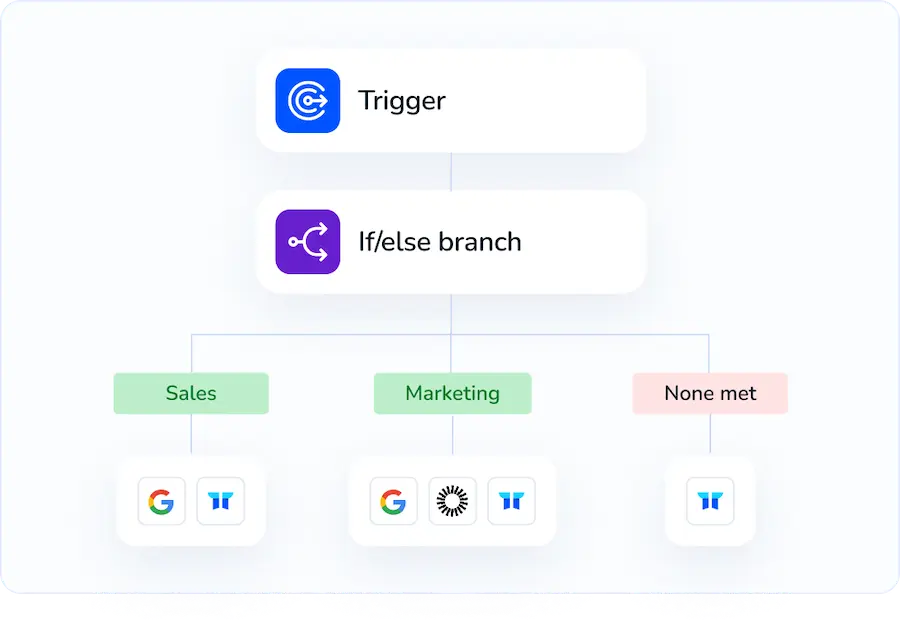
With Torii, you can automate this end to end, triggering the action whenever a condition is met. Triggers might include a new employee, a termination, a contract renewal, and similar events. If you perform this task often, automation can save significant time and reduce errors.
To add user to group in Jira from Torii, follow these steps:
1. Sign up for Torii
Contact Torii, and request your free two-week proof-of-concept.
2. Connect your Jira account to Torii
Once your account is active, connect Jira to Torii (assuming you already have a Jira account). Here are the instructions for the Jira integration.

3. Create a Torii workflow for Jira
Within Torii, create an automated workflow to add user to group in Jira. Go to the Workflows tab, define your trigger, and add the action that adds the user to the desired Jira group. After that, every time the trigger fires, Jira will be updated automatically.

Use Jira’s API
Here, you’ll use Jira’s Cloud REST API to add a user to a group. No UI clicks, just HTTP calls Jira documents in its own API reference.
Set up authentication for API calls
You can authenticate with:
- Basic auth using your Atlassian account email and an API token.
- OAuth 2.0 if you already have it set up.
This guide shows curl with Basic auth. Replace your-domain, email, and api_token as needed.
Find the group you want to target
If you already know the group name or ID, skip to the add step. Otherwise, use one of Jira’s group endpoints.
Example: search for a group with Groups Picker (Jira API: Groups picker)
curl --request GET \
--url 'https://your-domain.atlassian.net/rest/api/3/groups/picker?query=software' \
--user '[email protected]:api_token' \
--header 'Accept: application/json'
Example: fetch a specific group by name or ID (Jira API: Get group)
# By name
curl --request GET \
--url 'https://your-domain.atlassian.net/rest/api/3/group?groupname=jira-software-users' \
--user '[email protected]:api_token' \
--header 'Accept: application/json'

# By ID
curl --request GET \
--url 'https://your-domain.atlassian.net/rest/api/3/group?groupId=1234567890abcdef' \
--user '[email protected]:api_token' \
--header 'Accept: application/json'
Note the groupId or the exact groupname. You’ll need one of them for the add call.
Get the user’s accountId
Jira Cloud adds users to groups by accountId, not username or email. Use the user search endpoint to look it up (Jira API: Find users).
curl --request GET \
--url 'https://your-domain.atlassian.net/rest/api/3/user/search?query=alex%40example.com&maxResults=10' \
--user '[email protected]:api_token' \
--header 'Accept: application/json'
From the response, grab the accountId for the user you want.
Tips:
- If email search is restricted on your site, search by display name instead.
- You can also search with partial strings and filter results client-side.
Add the user to the group
Use Jira’s “Add user to group” endpoint. Provide either groupId or groupname as a query param, and send the user’s accountId in the JSON body.
Example: add by groupId (Jira API: Add user to group)
curl --request POST \
--url 'https://your-domain.atlassian.net/rest/api/3/group/user?groupId=1234567890abcdef' \
--user '[email protected]:api_token' \
--header 'Accept: application/json' \
--header 'Content-Type: application/json' \
--data '{"accountId":"abc123def456"}'
Example: add by groupname
curl --request POST \
--url 'https://your-domain.atlassian.net/rest/api/3/group/user?groupname=jira-software-users' \
--user '[email protected]:api_token' \
--header 'Accept: application/json' \
--header 'Content-Type: application/json' \
--data '{"accountId":"abc123def456"}'
Success returns 201 Created with the user’s representation.
Verify the membership
List group members and confirm the accountId is present (Jira API: Get group members).
# By groupId
curl --request GET \
--url 'https://your-domain.atlassian.net/rest/api/3/group/member?groupId=1234567890abcdef&maxResults=50' \
--user '[email protected]:api_token' \
--header 'Accept: application/json'

# Or by groupname
curl --request GET \
--url 'https://your-domain.atlassian.net/rest/api/3/group/member?groupname=jira-software-users&maxResults=50' \
--user '[email protected]:api_token' \
--header 'Accept: application/json'
Helpful checks and errors
- Permissions: you need admin rights to manage group membership.
- Existing member: the add call returns an error if the user is already in the group. You can safely check membership first.
- Not found: 404 if the group or user doesn’t exist.
- Rate limits: if you hit 429, back off and retry with exponential delay.
- Group identifiers: prefer groupId when possible. Group names can change.
Frequently Asked Questions
You have three options to add a user to a group in Jira — use Jira's UI (Cloud or Data Center/Server), automate via Torii SMP, or call Jira Cloud REST API. Choose based on frequency, automation needs, and directory control.
Use Jira's UI for manual, infrequent additions or quick one-offs. Cloud users add via admin.atlassian.com; Data Center/Server admins use Jira's User Management. Ensure you have the correct admin role and the target group grants product access.
Authenticate (API token or OAuth), find the group's groupId or exact groupname, retrieve the user's accountId, then POST to /rest/api/3/group/user with accountId in the JSON body. Verify with GET group member endpoint.
Common issues include disabled Add when groups sync from external directories (LDAP/Azure AD), 404 for missing group or user, errors if the user already exists in the group, insufficient admin permissions, and rate-limit 429 responses requiring backoff.
Torii centralizes SaaS management and can automate adding users to Jira groups via workflows and triggers (on hire, termination, contract changes). Connect your Jira account, create a workflow action to add the account to a group, and let Torii run it automatically.
In the UI, open the group's Members list or the user's profile to confirm membership. Via API, GET /rest/api/3/group/member?groupId=... or ?groupname=... and look for the user's accountId. Recheck product access for Jira Cloud groups.

