3 Ways to Add Users to Canva

Trying to get everyone into the same Canva space can feel harder than it should. Maybe you just hired a designer, or you need marketing to check the latest draft, yet the Invite button keeps hiding in plain sight.
No worries. Below you’ll find three simple routes to add users, keep permissions tidy, and move projects forward without hiccups.
Table of Contents
Use Canva’s UI
This walkthrough shows how to add teammates to your Canva workspace using the interface.
Step 1. Open the workspace that needs the new user
- Sign in and look at the left sidebar.
- Right under the Canva logo, click the workspace name.
- If you have more than one, pick the correct workspace from the drop-down list.
Step 2. Go to the People page
- Still in the left sidebar, tap the gear icon labeled Settings.
- In the middle panel that loads, hit People. Canva’s help guide calls this the hub for all member management.
Step 3. Start an invite
- In the top-right corner, press Invite members.
- A small window pops up where you can type one email address or paste several, separated by commas.
Step 4. Set the user role before sending
- Right below the email box, use the Role menu.
- Member: can create and edit their own designs.
- Template designer: can publish templates for the team.
- Admin: gets billing and seat-management powers.
- Pick the role that fits, then choose Send invite.
Step 5. Confirm the invite went out
- Back on the People page, you’ll see the new address listed as Pending.
- Canva’s docs note that the status switches to Accepted once the person clicks the link in their inbox.
Step 6. (Optional) Use a shareable invite link
- Instead of email, hit Copy invite link in the same pop-up.
- Set the role, copy the link, and drop it in Slack or email.
- Anyone who opens it will land on a Canva sign-up page tied to your workspace.
After you send the invite, the hard part is over. The invite stays in Pending until it’s accepted, and Canva updates the seat tally for you.
Use Torii
Instead of provisioning users directly in Canva, use Torii, a SaaS management platform, to handle the job. SMPs bring every subscription and integration into one dashboard, so teams can onboard or offboard staff, review license data, and more from a single place.
With Torii in place, the entire process runs on autopilot. Once a predefined event occurs, such as a new hire joining, an employee leaving or a contract renewal, Torii executes the task without anyone touching a keyboard. When you do this regularly, the time savings add up fast.
To set up user creation in Canva via Torii, follow these steps:
1. Sign up for Torii
Contact Torii and request a complimentary two-week proof-of-concept.
2. Connect your Canva account to Torii
After Torii is live for your team, connect Canva to it. Follow these integration instructions.

3. Create a Torii workflow for Canva
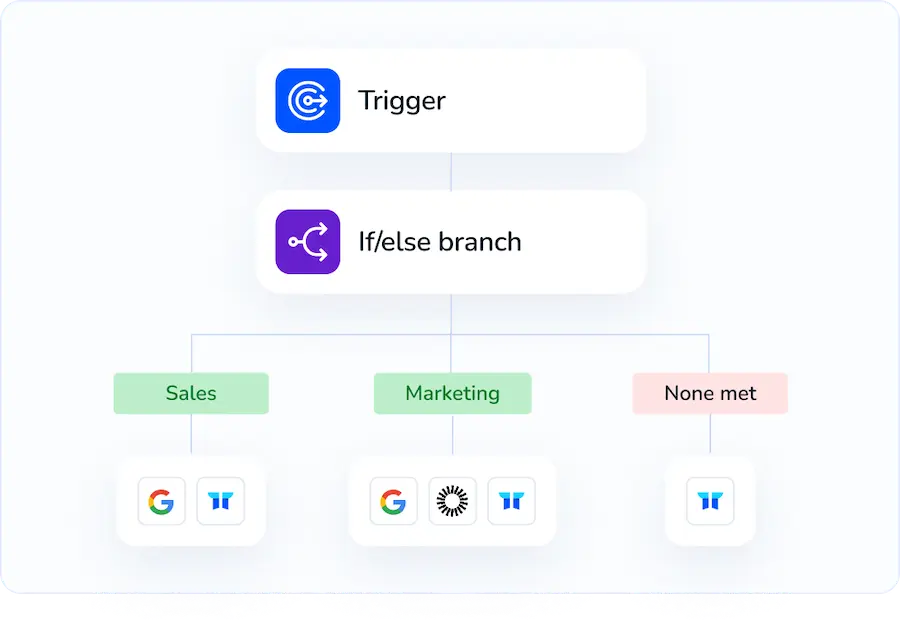
Inside Torii, build an automated workflow that provisions users in Canva. Navigate to the Workflows tab, set a trigger, and add an action that creates a Canva user. From then on, Canva updates automatically whenever the trigger fires.

Use Canva’s API
Sometimes you just want to add teammates without ever opening the Canva dashboard. The API makes that easy. Below is a quick guide to creating a user with Canva’s SCIM-compatible endpoint, so you can automate onboarding.
Step 1: Swap your client credentials for an access token
- Send a POST to
https://api.canva.com/oauth/token. - Grant type:
client_credentials. - Include
client_idandclient_secretin the body. - Canva returns an
access_tokenplus its expiry time. Keep that token handy for the next calls.
Example curl:
curl -X POST https://api.canva.com/oauth/token \
-H "Content-Type: application/x-www-form-urlencoded" \
-D "client_id=YOUR_CLIENT_ID" \
-D "client_secret=YOUR_CLIENT_SECRET" \
-D "grant_type=client_credentials"
Step 2: Craft the user payload
You only need a handful of fields to satisfy Canva and the SCIM spec. The sample below hits the bare minimum, leaving plenty of room for optional attributes if you need them later.
{
    "schemas": ["urn:ietf:params:scim:schemas:core:2.0:User"],
    "userName": "[email protected]",
    "name": {
        "givenName": "Jordan",
        "familyName": "Lee"
    },
    "emails": [
        {
            "value": "[email protected]",
            "type": "work",
            "primary": true
        }
    ]
}
Feel free to add optional SCIM fields like title or active if your workflow needs them.
Step 3: Send the create-user call
- Endpoint:
POST https://api.canva.com/scim/v2/Users - Header
Authorization: Bearer ACCESS_TOKEN - Header
Content-Type: application/scim+json
Example curl:
curl -X POST https://api.canva.com/scim/v2/Users \
-H "Authorization: Bearer YOUR_ACCESS_TOKEN" \
-H "Content-Type: application/scim+json" \
-D @new_user.json
Step 4: Review the response
When the call works, the server answers with the familiar 201 Created status code. Canva returns a JSON block that includes:
idCanva’s unique ID for the useruserNameThe email you sent- Time stamps for
createdandlastModified
Save the id; you’ll need it for future updates, group assignments, or deprovisioning.
Step 5: Handle errors right away
Most errors show up in predictable ways, so check the status code before you retry the call.
- 400 Bad Request Missing or malformed fields.
- 409 Conflict User already exists in the team.
- 401 Unauthorized Expired or incorrect token.
Retry only after fixing the root cause. Flooding the endpoint with the same bad request won’t help and could trigger rate limits.
With these calls wired into your system, adding a new Canva user is a background task, not a manual chore.
Torii for SaaS Management
If you’d like a deeper look at SaaS Management, reach out to our team today for guidance. Torii’s SaaS Management Platform helps you to:
- Discover shadow apps: AI continuously scans your environment, quickly flagging unapproved software the very moment seems anywhere in the org.
- Reduce spending: Cut costs by reclaiming idle licenses, retiring overlapping tools, and giving every team clarity on what stays.
- Automate onboarding and offboarding: Take routine onboarding and offboarding off IT’s plate, significantly reducing manual work and errors in every department.
- Receive timely renewal reminders: Receive early alerts so contract deadlines don’t sneak past you, giving procurement and legal ample time to negotiate.
Torii is the industry’s first comprehensive SaaS Management Platform, giving Finance, IT, and Security one trustworthy source of truth.
Learn more by visiting Torii and see how it streamlines your SaaS stack from procurement through renewal.
Frequently Asked Questions
You have three ways to add users to Canva: use the Canva interface, automate through a Torii workflow, or call Canva's SCIM API. Pick your workspace, set a role, then send an invite or let Torii or the API handle it automatically.
Canva offers three standard roles: "Member" can design and edit their own projects, "Template designer" can publish templates for the team, and "Admin" manages billing and seats. Choose the role in the invite window before sending or copying the link.
Yes. In the Invite members pop-up, select "Copy invite link," assign the appropriate role, and paste the URL into Slack, email, or chat. Anyone who opens it lands on a Canva sign-up page that automatically joins your workspace.
Torii connects to Canva via API, then runs workflows triggered by events such as onboarding, offboarding, or renewals. When the trigger fires, Torii automatically creates or deactivates the user in Canva, saving IT time and keeping license counts accurate.
Canva's SCIM-compatible API lets you provision users programmatically. With an access token and a simple JSON payload, your HR or identity system can add, update, or disable accounts instantly, eliminating manual dashboards and ensuring new hires get design access on day one.
When calling the /scim/v2/Users endpoint, check status codes. 400 means required fields are missing, 409 signals the user already exists, and 401 indicates an expired or incorrect token. Fix the issue before retrying to avoid rate limits and duplicate requests.
SaaS management platforms like Torii discover shadow apps, surface idle licenses, and issue early renewal alerts. By automating onboarding and offboarding, they reclaim unused seats, cut duplicate tools, and give Finance and IT real-time data to negotiate better contracts.

