3 Ways to Calculate Annual Cost for Your Snowflake Account in 2026

Snowflake makes it easy to spin up warehouses, but the bill can grow fast when queries, stages, and tasks run day and night. Finance keeps asking why.
We’ll walk through three clear methods you can use today to nail down your yearly spend, see what drives it, and set budgets with confidence.
Table of Contents
Use Snowflake’s UI
The steps below walk through Snowsight to surface the past year’s spend in minutes.
1. Sign in to Snowsight
- Open the Snowflake web URL tied to your account.
- Enter your username and password, then choose the role with ACCOUNTADMIN rights so you can see account-wide data.
Snowflake’s docs note that only roles with usage privileges on the ACCOUNT_USAGE schema can see full cost data.
2. Go to the Usage area
- Scan the left navigation bar.
- Click Admin, then select Usage.
Snowflake’s help site calls this the central spot for spend, credit, and storage tracking across the account.
3. Change the date range to a full year
- Near the top, find the filter labeled Date Range.
- Open it and pick Past 12 Months.
The charts and tables update immediately, giving you a full year of activity at a glance. Use Custom if your fiscal year follows a different calendar.
4. Read the headline numbers
- The summary tiles show Total Credits and Total Cost in your billing currency.
- Because compute, storage, and cloud-services credits are already combined, the numbers represent your full annual spend.
5. Drill into cost by category
-
Just under the summary, toggle between the Compute, Storage, and Cloud Services tabs.
-
Each tab lists:
- Usage by warehouse or database
- Credits burned
- Actual dollar cost
This breakdown highlights the parts of the platform that drive the bill, making optimization efforts easier to target.
6. Inspect month-over-month trends
- Scroll to the bar chart labeled Monthly Usage.
- Hover over any bar to see the exact credits and cost figure for that month.
- The visual quickly reveals seasonal swings or unexpected spikes.
7. Export the data (optional)
- In the upper right corner, click the download icon.
- Choose CSV for raw data or PNG for a slide-ready image.
Snowflake’s documentation confirms that exports keep the date filter you set, so your numbers remain consistent.
8. Log out or switch roles
When finished, click your profile icon and Sign Out, or swap back to a lower-privilege role to maintain security hygiene.
After these eight steps, Snowsight presents a straightforward view of your yearly Snowflake spend, ready for deeper analysis or budget review.
Use Torii
Skip the Snowflake console and open Torii, a SaaS management platform, to check annual Snowflake spending. The tool pulls data from every SaaS license your company owns and displays it in one dashboard.
To see Snowflake’s annual cost through Torii, follow these steps:
1. Create a Torii account
Reach out to the Torii team for a free two-week proof of concept to get started.
2. Link your expense systems and contracts
Once your tenant is live, connect your finance tools (Coupa, QuickBooks, and similar platforms) to Torii to sync transactions.
You can also upload contracts directly; Torii’s AI scans the files, captures subscription costs, and updates them automatically.
Here are more instructions for the Snowflake integration.
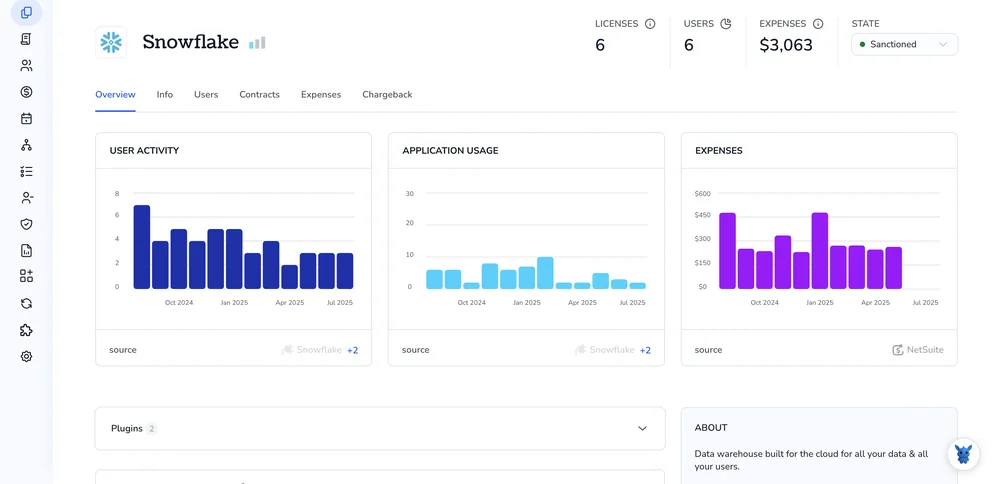
3. Look up Snowflake in Torii
Use the dashboard’s search bar and enter “Snowflake” to locate the application.
Open the Snowflake application page to see license counts, total spend, upcoming renewal dates, and other pertinent information.

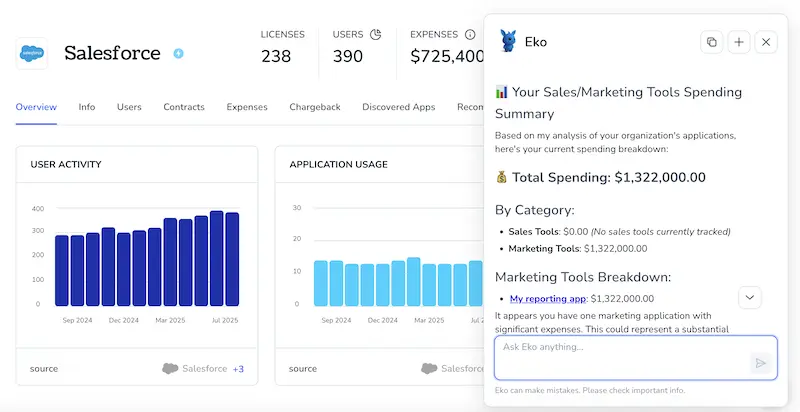
Or, chat with Eko
Torii’s chat-based assistant, Eko, fetches Snowflake usage data on demand. Open the Eko icon in the lower-right corner of the dashboard, type your Snowflake request, and see the results stream back in the chat window.
Use Snowflake’s API
Here you’ll run one API call that sums the credits you used over the last 12 months, then turn that number into dollars.
1. Get an OAuth access token
You need a short-lived token before Snowflake lets you hit its SQL REST endpoint for any query.
In Snowflake, create (or reuse) an OAuth security integration:
create or replace security integration rest_api_oauth
type = oauth
oauth_client = custom
oauth_issue_refresh_tokens = true
oauth_redirect_uri = 'https://localhost';
- Grab the
client_idandclient_secretSnowflake returns. - Exchange them for an access token:
curl -u ':' \
https://.snowflakecomputing.com/oauth/token-request \
-D 'grant_type=password&username=&password=&scope=SESSION:ROLE-ANY'
Note the access_token in the JSON response.
2. Build the cost query
The ACCOUNT_USAGE view called METERING_HISTORY tracks credits by hour, and one simple sum gives you the yearly total.
select
sum(credits_used_compute + credits_used_cloud_services) as total_credits
from snowflake.account_usage.metering_history
where start_time >= date_trunc(year, current_date) - interval '1 year'
and start_time < date_trunc(year, current_date);
Save that SQL string for the next call.
3. Call the SQL REST API
You’ll send your query to Snowflake’s REST endpoint located at /api/v2/statements, which accepts JSON payloads.
curl -X POST \
'https://.snowflakecomputing.com/api/v2/statements?warehouse=&role=&database=&schema=' \
-H 'Authorization: Bearer ' \
-H 'Content-Type: application/json' \
-D '{
    "statement": "select sum(credits_used_compute + credits_used_cloud_services) as total_credits from snowflake.account_usage.metering_history where start_time >= date_trunc(year, current_date) - interval '\''1 year'\'' and start_time < date_trunc(year, current_date);",
    "timeout": 60
}'
The response looks like:
{
    "data": {
        "rowtype": [ { "name": "TOTAL_CREDITS", "type": "fixed" } ],
        "rowset": [ [ "12345.67" ] ],
        "total": 1
    }
}
12345.67 is the credits used over the last year.
4. Turn credits into dollars
Multiply the credit count by the contract price you pay per credit to convert usage into spend.
Annual Cost = total_credits * credit_price
If your price is $2.50 per credit, the example above costs 12345.67 * 2.50 = $30,864.17.
With a single token request and one POST call, you now know your yearly Snowflake spend.
Torii for SaaS Management
SaaS management grows more complex as subscriptions pile up across teams. Tell us what you need; Torii’s SaaS Management Platform lets you:
- Uncover shadow IT: Continuous discovery spots unapproved or forgotten apps as soon as they appear.
- Reduce spend: Retire idle licenses and combine overlapping tools before the next invoice hits.
- Automate onboarding/offboarding: Workflow-driven handoffs remove repetitive IT tasks, saving hours and cutting mistakes.
- Stay ahead of renewals: Timely alerts surface every contract deadline so nothing slips through.
Torii offers an end-to-end SaaS management platform that unites every stakeholder. It gives Finance, IT, and Security teams a shared, reliable view of all subscriptions.
Learn more by visiting Torii.
Frequently Asked Questions
You have three immediate choices: open Snowsight and set Date Range to Past 12 Months, search for Snowflake in Torii’s dashboard, or call the SQL REST API with a SUM over METERING_HISTORY. Each route returns total yearly credits and their cost.
Snowsight surfaces full spend only when you log in with the ACCOUNTADMIN role or any role granted usage privileges on the "ACCOUNT_USAGE" schema. These elevated rights unlock organization-wide credit, storage, and cloud-services data needed for accurate budgeting.
Torii aggregates finance feeds and contracts, so after you connect systems like Coupa or QuickBooks, simply search "Snowflake" in the dashboard or ask the Eko assistant. The platform instantly displays license counts, yearly spend, and upcoming renewals in one place.
Use the view "snowflake.account_usage.metering_history". Summing the columns CREDITS_USED_COMPUTE and CREDITS_USED_CLOUD_SERVICES over the previous twelve months gives a single credit figure. The API endpoint /api/v2/statements lets you run that SQL from any script or integration.
Multiply the total credits you retrieved by your negotiated per-credit rate. For example, 12,345.67 credits at $2.50 each equals $30,864.17. Keeping the price in a variable lets finance teams model scenarios or compare against different contract tiers easily.
Yes. After selecting the 12-month range, click the download icon in Snowsight’s Usage view and choose CSV for raw numbers or PNG for visuals. The export respects your date filter, so the figures remain identical to what you saw onscreen.
