3 Ways to Add Users to Your ClickUp Team in 2026
Explore three methods to add users to your ClickUp team for easier workspace setup and streamlined team management processes
Ask about this article
Opens Claude in a new tab to answer, using this article as the source.
Inviting teammates into ClickUp should feel quick, not confusing. Whether you’re onboarding a new hire or looping in a freelancer, the right approach keeps projects moving and everyone on the same page.
Below, we break down three simple ways to add users, direct invites, sharing via teams, and importing from other tools, so you can pick what matches your workflow and security needs.
Table of Contents
Use ClickUp’s UI
Use ClickUp’s workspace settings to invite teammates and assign the right level of access.
1. Open the People menu
- Select your workspace avatar in the lower-left corner.
- In the pop-up, choose “People.” You’ll see everyone already in the workspace.
2. Start a new invite
Click the purple “Invite people” button in the upper-right corner of the People screen. A side panel appears.
3. Enter their email
- Type one or more email addresses, separated by commas.
- Paste a list if you like; ClickUp splits it into individual invites for you.
4. Choose the right role
- Member: Full workspace access except admin-only areas.
- Guest: Limited to the spaces, folders, or lists you pick.
- Use the dropdown next to each email to switch between Member and Guest.
5. Set initial permissions (optional but handy)
- For Guests, tick the boxes for the exact spaces they should see.
- For Members, leave everything open or toggle off any spaces you’d rather hide for now.
6. Send and confirm
- Press “Send Invite.”
- The person appears as “Pending” until they click the link in their email. Resend or cancel the invite from the same People page if needed.
That’s it. After they accept, they’ll show up under Active and can get to work.
Use Torii
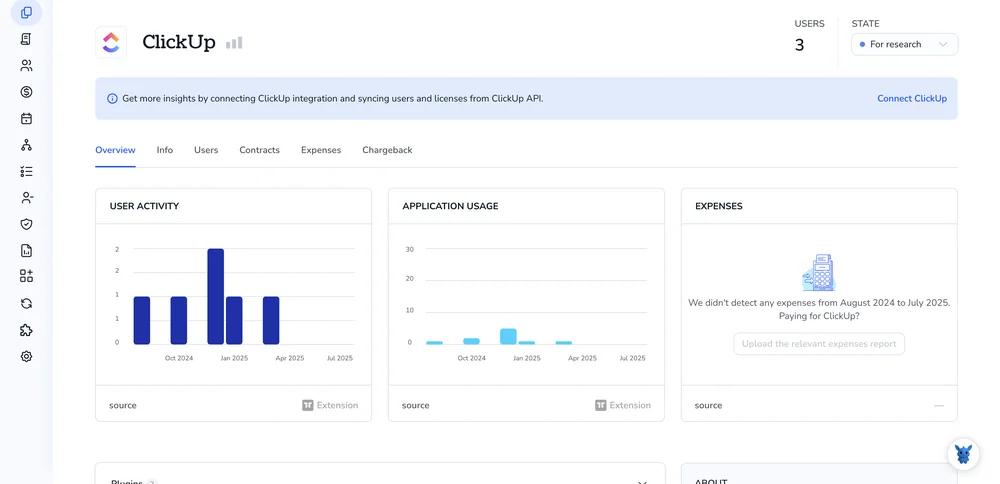
Skip the ClickUp login and let Torii add users to the right team. This SaaS management platform gathers every cloud app and subscription in one place so you can automate onboarding, off-boarding, license tracking, and more.
Torii triggers the update whenever a predefined event occurs, such as a new hire’s start date, an off-boarding, or a contract milestone. Automation means you don’t have to repeat the same clicks every time the situation arises.
1. Sign up for Torii
Reach out to Torii and request a complimentary 14-day proof-of-concept to get started.
2. Connect your ClickUp account to Torii
Once your Torii environment is up and running, link your ClickUp tenant to it (assuming you already hold a ClickUp account). Follow the steps in the official guide: ClickUp integration instructions.
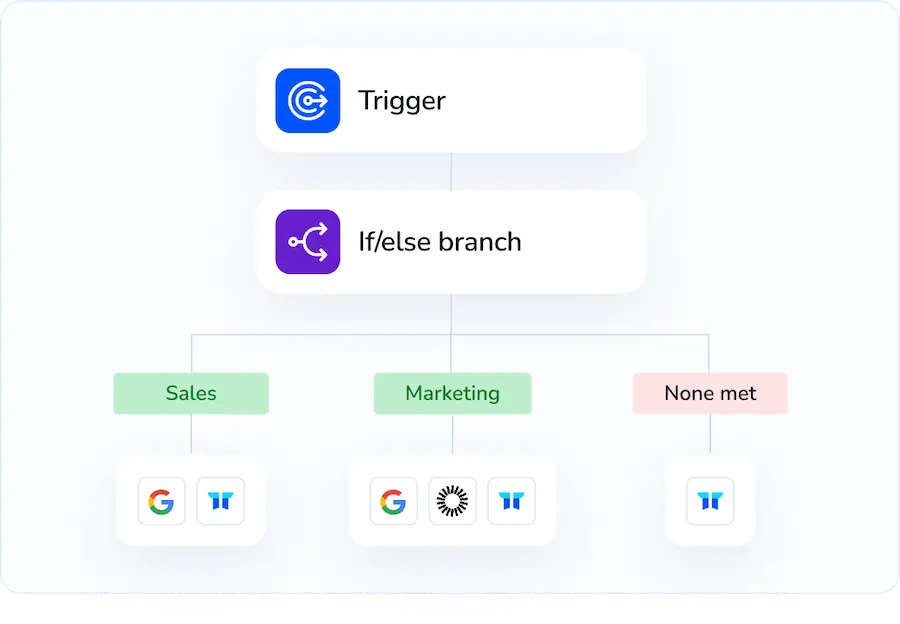
3. Create a Torii workflow for ClickUp
Inside Torii, open the Workflows tab and choose the trigger that will launch the process. Add the action that drops the user into the right ClickUp team. After saving, every time the trigger fires, ClickUp will be updated automatically.
Use ClickUp’s API
This short walk through lets you invite a teammate with a single API call. First you’ll grab the team ID, then send the invite.
1. Collect what you need
- A ClickUp API token that can manage users
- The email of the person you’re inviting
- The team_id for the workspace
2. Find the team_id
GET https://api.clickup.com/api/v2/team
Authorization: YOUR_API_TOKEN
The response lists every workspace your token can directly reach. Copy the id for the one you want.
3. Send the invite
POST https://api.clickup.com/api/v2/team/{team_id}/user
Authorization: YOUR_API_TOKEN
Content-Type: application/json
{
    "email": "new.user@example.com"
}
Replace {team_id} with the numeric value you just copied earlier. The body only needs the email address.
4. Check the response
- 200: success. The JSON block returns the new
userobject. - 400: email missing or malformed.
- 403: token lacks permission.
- 409: user already belongs to the team.
Fix any issues, resend if needed, and the user’s invite lands in their inbox.
Torii for SaaS Management
Looking for ways to tame your SaaS stack and cut waste? Torii’s SaaS Management Platform helps you:
- Uncover shadow IT: AI-driven discovery monitors your environment and flags unapproved apps as soon as they appear.
- Reduce spending: Reclaim unused licenses and drop overlapping tools to shrink the software bill.
- Automate onboarding/offboarding: Workflows handle employee lifecycle tasks so teams save time and avoid mistakes.
- Stay ahead of renewals: Reminders surface contracts early, giving you room to renegotiate or cancel.
Torii unites Finance, IT, and Security teams around a single source of SaaS truth.
Learn more at Torii.
Frequently Asked Questions
ClickUp supports three invite methods. Use the People menu inside the app, import users automatically through Torii workflows, or send a POST call to /team/{team_id}/user with an email. Choose whichever matches your workflow and security requirements.
Members get full workspace visibility except admin settings; Guests only see the specific spaces, folders, or lists you grant. Switch the role per email during the invite so contractors stay limited while employees enjoy broader access.
Yes. After connecting your ClickUp tenant, create a Torii workflow with a trigger like a new-hire start date. Torii then pushes the user into the correct ClickUp team automatically, handling licenses, permissions, and audit logs without manual clicks.
When you invite a Guest, you can tick checkboxes for each space, folder, or list they may access and leave everything else hidden. This tight scope keeps client or contractor accounts restricted while still collaborating inside shared tasks.
First call GET /team with your API token to retrieve the workspace id, then POST to /team/{team_id}/user with a JSON body containing the email. A 200 response confirms success and sends the recipient an email invitation.
The invite endpoint returns helpful codes: 400 when the email field is missing or malformed, 403 if your token lacks user-management rights, and 409 when the address already belongs to the team. Fix the issue, then resend.